
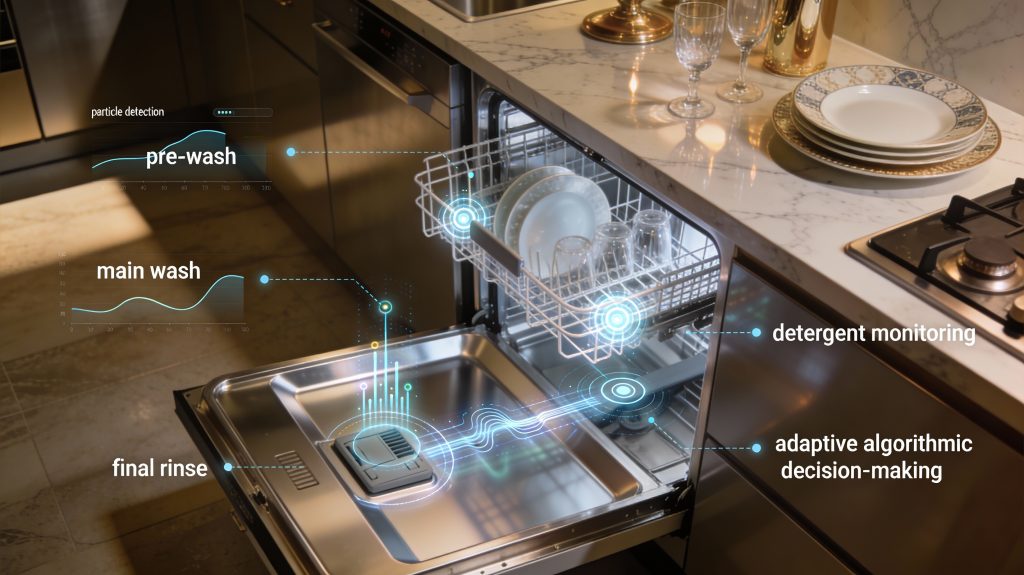
Modern dishwashers, especially smart models, have evolved from simple timed boxes into data-driven appliances, with soil sensors serving as the “eyes” of the machine. These sophisticated components go beyond rigid, pre-set timers by measuring the actual cloudiness and chemical composition of the wash water in real time. This adaptive, sensor-driven approach allows the machine to intelligently decide whether to cut a rinse short to save water or extend a heavy-duty wash to tackle stubborn grease — making a smart dishwasher a worthwhile upgrade for any modern kitchen
In this post, we’ll go under the hood to explore the core technologies — such as optical turbidity and conductivity sensing — that allow your dishwasher to make split-second decisions. We’ll examine how raw signals are processed into actionable data, where these sensors are strategically placed for maximum accuracy, and how to maintain them for peak efficiency.
Benefits of Smart Dishwashers
Soil sensors are the reason smart dishwashers outperform traditional models — they detect exactly how dirty the water is and adjust the cycle accordingly. Rather than running a fixed program regardless of the load, a sensor-driven dishwasher adapts its water volume, temperature, and run time to match actual soiling levels. The result is consistently cleaner dishes with less water and energy waste, though it does come with some calibration needs worth understanding.
Understanding Smart Dishwashers Technology
Why Soil Sensors Matter: Efficiency, Cleanliness, and Resource Optimization

Measurable Benefits You’ll See
Soil sensors allow your dishwasher to adapt in real time, delivering the same or better clean with less waste. In practical terms, that means shorter cycles for lightly soiled loads, fewer rewash episodes, and lower water and electricity bills. High-end models from manufacturers such as Bosch (800 Series) and Miele (G-class) are among the best examples of how soil sensing translates directly into efficiency and cleaning performance.
Key metrics to judge sensor performance
When you evaluate a dishwasher’s sensor system, watch these measurable outcomes:
Use these metrics to compare models or to spot degraded performance after many years.
Trade-offs: conservative vs aggressive logic
Manufacturers tune control logic along a spectrum:
If you want predictable speed, choose aggressive settings only for consistently light loads; keep conservative logic for pots, pans, or when guests come over.
Practical tips you can apply now
Next sections will show how sensors detect these differences and how the electronics translate signals into action.
Core Sensing Technologies: Optical, Conductive, and Turbidity Measurements

You’ve seen why soil sensing matters. Now let’s look under the hood: the principal physical sensing techniques you’ll find in modern dishwashers, how they differ, and practical tips for getting reliable readings in real life.
Optical (IR/visible) scattering and absorption
Optical sensors use an LED (IR or visible) and a photodiode to detect light blocked or scattered by particles or films. They respond quickly and are commonly used in compact, low-cost implementations.
Conductivity / TDS sensing
These sensors measure ionic content (salts, dissolved detergent) between electrodes — a proxy for dissolved soils and detergent carryover.
Turbidity (nephelometric) sensors
Turbidity sensors quantify suspended particulate matter by measuring light scattered at an angle (typically 90°). These are the workhorses for detecting food particles and cloudiness.
Comparing performance and real-world tradeoffs
Why hybrids are common
Combining turbidity and conductivity lets the system distinguish detergent carryover (high conductivity, low turbidity) from particulate soil (high turbidity, variable conductivity), reducing false cycle extensions. In practice, this hybrid logic is what lets “Auto” cycles shorten reliably for light loads while still extending for greasy pans.
Next you’ll see where these sensors are placed and exactly what they measure during a cycle.
Practical Sensor Placement and What Gets Measured During a Cycle
Where sensors typically live
Manufacturers place sensors where the signal best answers the question at hand:
Choose the location that matches your diagnostic goal: detect big crumbs (spray arm), monitor overall wash cleanliness (recirculation), or confirm settled residues (sump).
When sensors sample during a cycle
Sensors aren’t read continuously at full fidelity the whole time — you’ll see scheduled sampling windows:
Typical signal patterns you’ll see
Operational factors that change the signals
Practical tip: if you’re troubleshooting, run a controlled test—one cup of milk for scattering, a teaspoon of salt for conductivity—while observing the sensor time windows. Next, we’ll look at how those raw traces are cleaned up and turned into decisions by electronics and algorithms.
From Raw Signal to Action: Electronics, Filtering, and Decision Algorithms
Benefits of Smart Dishwashers

You’ve seen where and when sensors sample; now follow the signal path from sensor element to a dishwasher decision. This section shows practical electronics choices, how you clean noisy traces, and the algorithmic strategies that translate signals into “extend wash” or “rinse again.”
Analog front-end and ADC considerations
Start by protecting and amplifying the sensor output:
Tip: calibrate full‑scale range to typical signal swings so you use the ADC’s dynamic range efficiently.
Signal conditioning: averaging, debouncing, and outlier rejection
Turn noisy traces into reliable inputs:
Example: one milk-cup turbidity spike will often produce a single high sample. Median + 3-sample confirmation prevents an unnecessary extra rinse.
Decision algorithms: thresholding, hysteresis, and advanced models
Translate conditioned signals into actions:
Minimizing false positives/negatives — control logic
Combine sensors and add state to decisions:
These steps turn raw voltages into robust, explainable decisions. Next, you’ll see how those decisions drive actuators — water valves, heaters, and cycle timing — to close the control loop.
System Integration: How Sensors Control Water, Temperature, and Cycle Length

This section shows how the conditioned sensor outputs become concrete actuator commands so your dishwasher meets a target cleanliness metric while minimizing water, energy, and time.
Closed-loop control sequence (practical how‑to)
A typical loop you’ll see in firmware:
Tip: implement a hard cap (max replacements, max extra minutes) to avoid runaway cycles.
Actuators and real-world hardware examples
Map decisions to components you can recognize:
Example product context: many premium models (Bosch, Miele) use variable‑speed recirculation and heater modulation to shorten cycles under light load; hobbyist control can be prototyped with an STM32 MCU, SSR, and a YF‑S201 flow sensor for feedback.
Resource savings and operational constraints
In field practice, soil‑driven control commonly reduces water use by ~20–40% and energy by ~10–25% versus static cycles, depending on baseline and load variability. Those are typical ranges—actual savings depend on sensor quality and conservative safety limits you enforce.
Safety, interlocks, and regulatory constraints
You must respect safety and standards (e.g., IEC 60335 family): door‑lock and water‑leak interlocks, over‑temperature cutouts, and maximum cycle/time constraints prevent aggressive optimization. Firmware should prefer deterministic fallbacks (e.g., fixed rinse after X ambiguous reads).
Verification and validation approaches
Validate with repeatable tests: standardized soiling (egg yolk, coffee, oil), lab turbidity tracking, and randomized household loads. Use A/B runs (sensor‑enabled vs baseline) and log sensor + actuator traces for regression testing.
Next, you’ll examine how those sensors stay accurate in the long run — calibration, maintenance, and troubleshooting.
Limitations, Calibration, Maintenance, and Troubleshooting
Smart soil sensors work well, but in the real world they face predictable failure modes. This section gives you hands‑on guidance to keep sensors accurate and a short diagnostic flow you can follow before calling service.
Common limitations (what to watch for)
Real‑world example: a family that runs heavily soiled pans in the bottom rack may see repeated extra rinse cycles because oil films cling to the turbidity window.
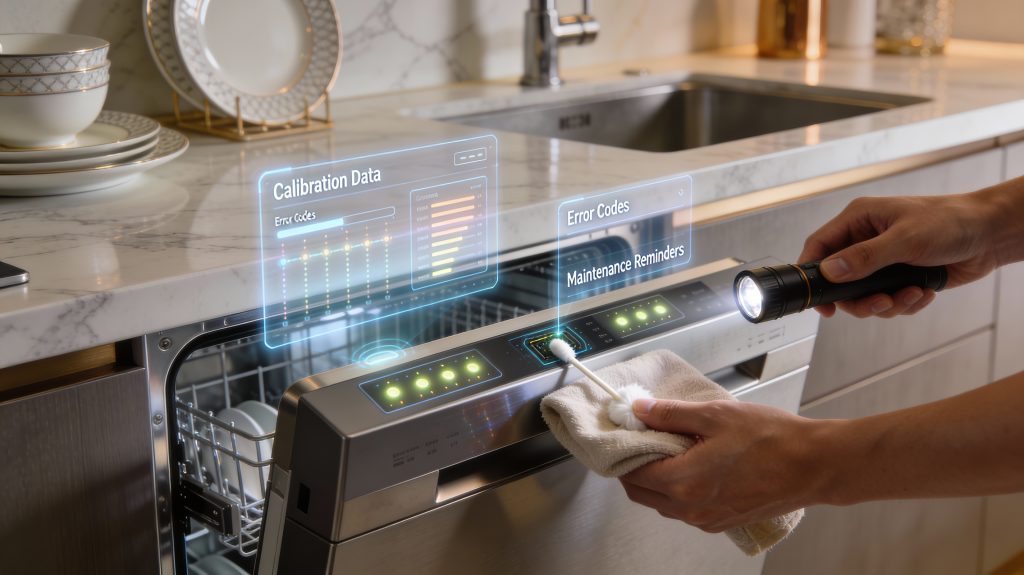
Routine maintenance (simple steps you can do)
Tools: flashlight to inspect ports, cotton swab, and a multimeter for continuity checks on electrode leads.
Calibration strategies manufacturers use
If accuracy degrades, manufacturers often recommend a service calibration rather than user tampering.
Embedded self‑tests & error codes to watch for
Quick troubleshooting flow (stepwise)
- Visually clean sensor and run a test cycle.
- If problem persists, enter diagnostics and run self‑test/log readout.
- Check hydraulics: verify pump runs, spray arms spin, and valves open.
- Change load pattern and detergent (light load, no enzyme).
- Update firmware or reset learned baselines.
- If still failing, schedule technician recalibration or module replacement.
Firmware updates and improved diagnostics often fix false positives by adjusting thresholds and adding better filtering—so keep your appliance software current before concluding the sensor is broken.
Next, you’ll learn what realistic performance you should expect and how to evaluate a dishwasher’s soil‑sensor behavior in household use.
What to Expect and How to Evaluate Sensor Performance
Treat sensor claims as realistic rather than absolute — expect better average efficiency, not perfect results every cycle. To evaluate performance, monitor your energy and water usage, spot-check cleanliness, and note any variation in cycle times. When comparing models, look for vendor data on test conditions and whether sensors adapt to different load types. Simple maintenance goes a long way: occasionally wipe the lens, check the filter, and run manufacturer-recommended calibration cycles to keep measurements accurate and reliable.