Experience true cinematic immersion without the hefty price tag or the nightmare of tripping over cables. While standard soundbars offer a significant step up from tinny TV speakers, adding wireless rear speakers transforms your living room into a multi-dimensional soundstage. By utilizing discrete audio channels rather than digital simulations, these budget-friendly systems deliver precise directional cues—like footsteps trailing behind you or the subtle rustle of leaves—that “virtual surround” simply cannot match. This guide explores how to achieve professional-grade home theater audio on a budget, focusing on Budget soundbars that prioritize low-latency connectivity and crystal-clear dialogue.
When searching for audio solutions, many people consider Budget soundbars as an option for enhancing their viewing experience.
Choosing the right setup requires balancing technical specs like HDMI eARC support, frequency response, and wireless stability against your specific room layout. Many affordable options now feature proprietary RF technology to eliminate lip-sync delays, ensuring your audio stays perfectly tethered to the action on screen. Whether you are looking for a compact 5.1 system for an apartment or a punchy subwoofer-satellite combo for a dedicated media room, understanding the architecture of budget wireless surround sound is key. We have analyzed the top-rated models to help you navigate tradeoffs in power and customization, ensuring you get the most decibels for your dollar.
Why choose a budget soundbar with wireless rear speakers
You want better home theater immersion without the complexity and cost of a full AV receiver and separate speakers. Pairing a compact soundbar with wireless rear speakers gives clearer dialogue, a wider soundstage, and convincing surround effects while keeping setup and cost low. Expect measurable improvements in center imaging and lateral ambience compared with standalone soundbars.
Be realistic about tradeoffs: you sacrifice some customization, headroom, and absolute bass authority versus high-end separates. This guide gives practical, data-driven advice so you can prioritize features, set up your room, and troubleshoot common issues to get the best performance from a budget wireless rear setup. We’ll help you choose wisely and save money today.
1
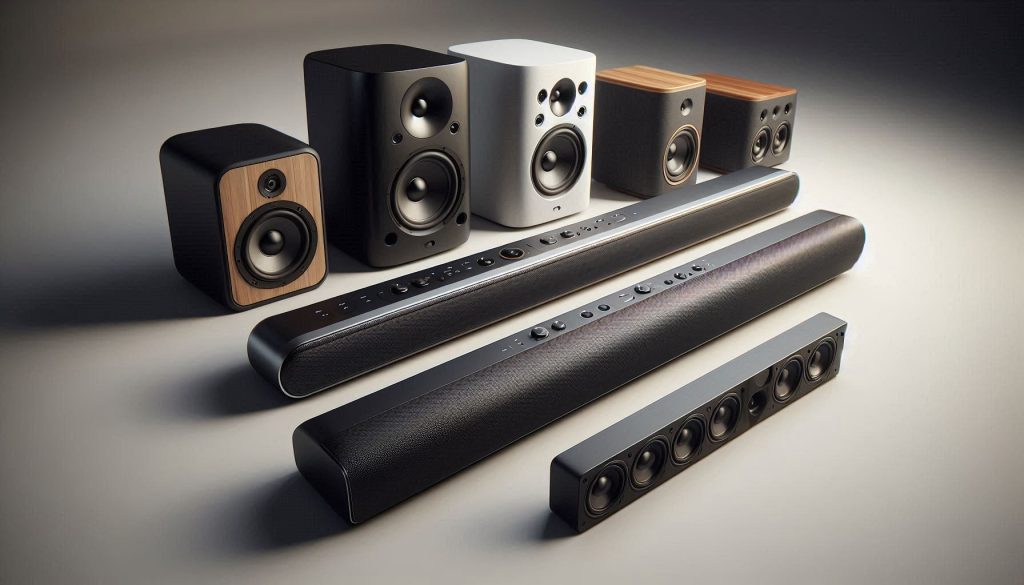
Understanding the architecture: how soundbars and wireless rear speakers work together
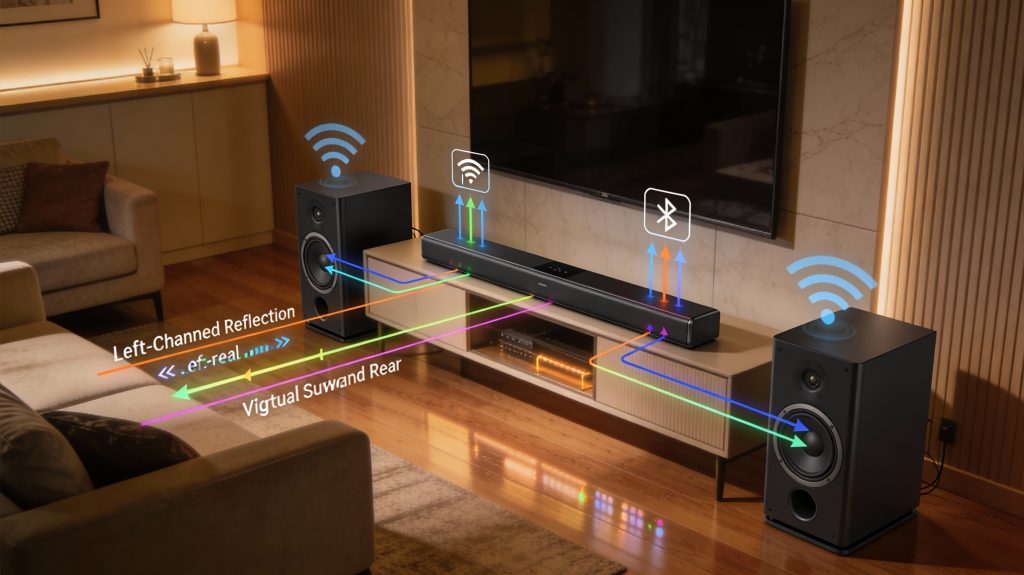
Understand how soundbars and wireless rear speakers work together: discrete channels, virtual surround, and connectivity explained visually.
Virtual surround vs. true discrete channels
You need to know whether a product is emulating surround or delivering discrete rear channels. Virtual surround uses DSP, beam‑forming, and reflections to synthesize rear cues from front drivers; true discrete setups send separate left‑rear and right‑rear signals to dedicated speakers. In practice, virtual systems can widen the stage and localize some effects, but discrete rears give clearer localization and more stable envelopment when you move around the room.
How wireless rear modules typically connect
There are three common link types, each with practical consequences:
Proprietary RF bridges (2.4/5 GHz): low latency, robust link, usually paired only with the maker’s soundbar (examples: many Samsung and Sony add‑on rears).
Dedicated wireless sub/satellite links: manufacturer uses the soundbar as a hub and streams discrete channels to powered rear satellites; reliable and usually lip‑sync corrected.
Bluetooth/Wi‑Fi hybrids: Sonos (Wi‑Fi mesh) and some newer systems use Wi‑Fi for multiroom robustness; Bluetooth is rare for rears because latency and loss make it unsuitable.
Choose RF/Wi‑Fi hubs for reliability; avoid Bluetooth‑only rear links unless the product explicitly supports a low‑latency profile.
Latency, sync and codec constraints
Latency matters — rear speakers that arrive late break immersion. Typical numbers to watch for:
Bluetooth (SBC/AAC): often >100 ms — unacceptable for rears unless an aptX‑LL path is present.
Proprietary RF / Wi‑Fi: manufacturers usually achieve <30–50 ms roundtrip and apply automatic lip‑sync correction.
Multichannel codecs: if the bar decodes Dolby Digital/DTS and then re‑streams discrete channels, you’ll get authentic surround; if the bar only receives stereo and upmixes, you’re in emulation territory.
Tip: test with dialogue-heavy scenes; if rears tug speech or sound late, latency is the issue.
Typical channel counts and signal paths — how to read specs
Common transitions you’ll see:
2.0/2.1 (soundbar only) -> add wireless rears -> marketed as “5.1” or “surround kit.”
3.1 (center + up‑firing) -> add rears -> 5.1.2 or similar when Atmos objects are rendered.
Quick checklist to interpret specs:
Look for “discrete 5.1” or explicit mention that rears receive surround channels.
Beware of “virtual 5.1” or “simulated surround” wording — those are DSP tricks.
Check whether rears are sold as a package or as optional add‑ons; the latter often use proprietary pairing.
Real-world example: pairing a Sonos Beam with two One SLs uses Wi‑Fi and results in distinct surround channels; a generic soundbar advertising “surround” without included rears is often virtual. In the next section you’ll see what those real benefits and tradeoffs look like in listening tests.
2
Real benefits and realistic tradeoffs of budget wireless rear setups
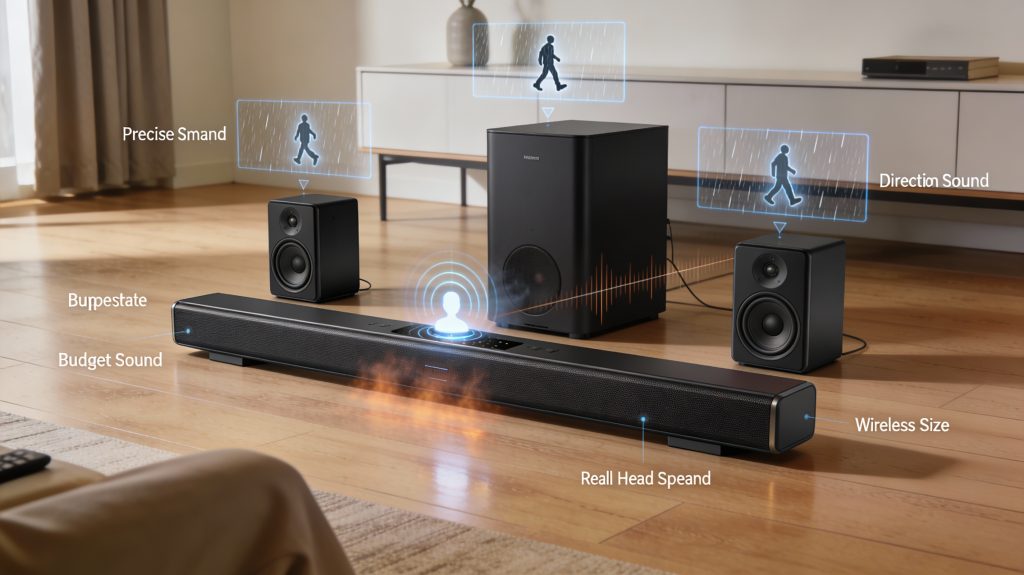
See the real benefits and tradeoffs of budget wireless rear setups: immersive surround, clearer dialogue, and punchy low-end with compact systems.
Tangible gains you can expect
When you add wireless rears (and often a wireless sub) to a budget soundbar, three things change noticeably:
Surround imaging becomes more precise. Instead of a broad “front-wide” soundstage, discrete rears give you clearer left/right rear cues and a stronger sense of envelopment — you’ll hear directionality in effects like rain, footsteps or rear‑channel ambience that was previously smeared to the front.
Dialogue clarity often improves. With discrete channels, the soundbar can offload ambient and surround material to the rears and let the center/front drivers focus on dialogue. In practice that can feel like a 2–6 dB improvement in speech-to-background ratio in dialogue-heavy scenes.
Low-frequency extension grows with a dedicated sub. A small powered sub will typically add 6–12 dB of output below ~80 Hz compared with the soundbar’s built‑in drivers, giving you real LFE weight for explosions and impact.
Real-world examples: a Vizio M‑Series 5.1 package shows how modest drivers plus a sub and rear satellites transform movie scenes; a Sonos Beam with One SLs illustrates Wi‑Fi discrete rears bringing clear ambient cues.
The tradeoffs you’ll live with
Budget wireless rears involve compromises:
Lower amplifier headroom: small built‑in amps and compact drivers clip sooner. Expect compression or distortion if you drive the system loudly in large rooms.
Simplified tone control: cheap systems often limit EQ options and lack parametric tuning, so balancing midrange and bass may require manual sub placement and level tweaks.
Potential compression at high volumes: small satellites often run out of excursion, turning dynamic peaks into flattened, congested sound.
Room-size, driver and enclosure effects
Driver size and cabinet design shape bass. Compact satellites (40–60 mm tweeters, 2–3‑inch woofers) won’t produce deep bass; the sub carries the low end. In apartments, small rooms will give you more perceived bass from a small sub (boundary gain) but risk neighbor complaints. In large living rooms you’ll need a bigger sub and more headroom to avoid distortion.
Quick, actionable tips
Set crossover near 80 Hz; if rears are tiny, raise it to 120 Hz.
Place rears slightly behind listening position, elevated ~1–1.5 m.
Use sub level and phase to blend — move the sub, don’t just raise volume.
Test with dialogue scenes and action cues to spot latency or compression.
3
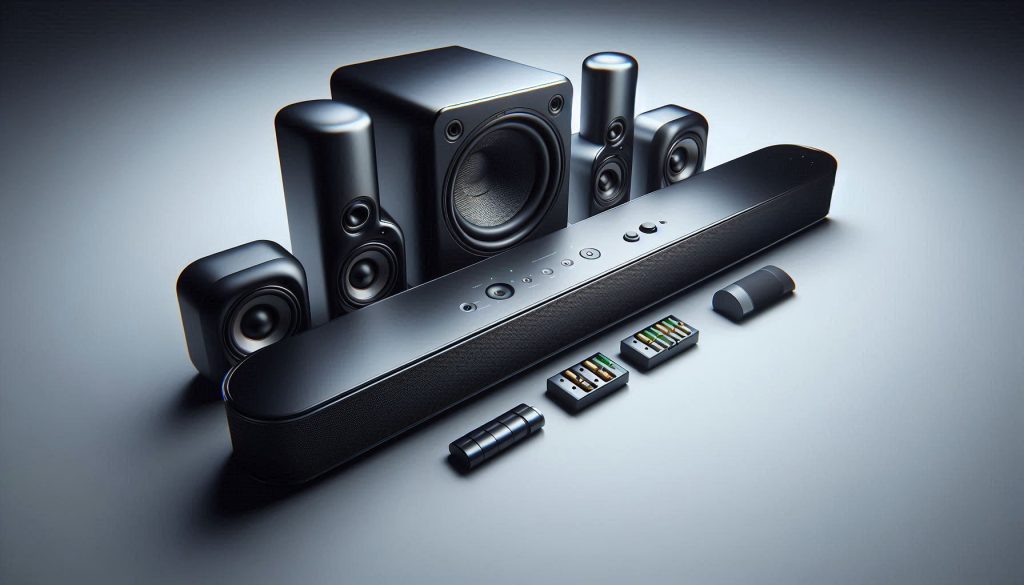
Key specifications and features to prioritize when buying
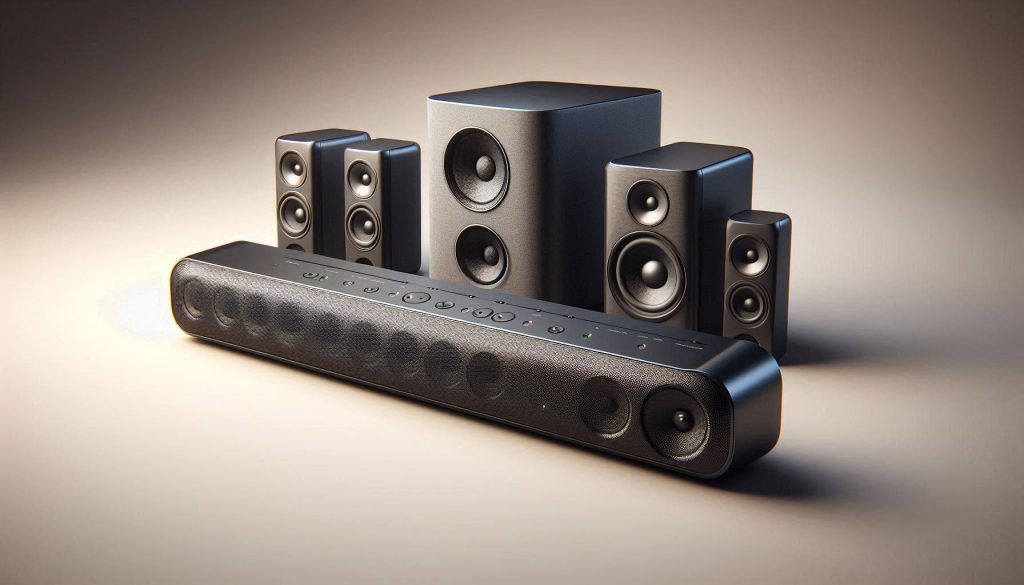
Budget wireless soundbar system with rear speakers and subwoofer, highlighting design, drivers, and connectivity.
When you move from general architecture to shopping, these are the objective specs and practical features that will most affect real-world performance. Think of this as a checklist you can run down when comparing listings and reviews.
Channel layout: what you really need
2.1 — Acceptable for tighter budgets; improves bass and dialogue but gives little real surround.
5.1 (or higher) — The target if you want discrete rear imaging and proper surround cues; prioritize a true 5.1 package over virtualized surround if possible.
Power, distortion and headroom
Per-channel power: expect 10–30 W RMS per satellite in budget sets. Don’t be fooled by inflated “peak” numbers.
Subwoofer power: aim for 50–150 W RMS to get usable low end in a medium room.
THD: ≤1% at typical listening levels is acceptable; ≤0.5% is strong.
Practical tip: more rated power gives headroom; if you listen loud in a large room, prioritize higher RMS sub power.
Frequency response and bass performance
Satellites: don’t expect meaningful output below ~100 Hz from tiny satellites — rely on the sub.
Subwoofer: look for -3 dB points near 40 Hz or lower for impactful LFE; if the spec only shows “20–20,000 Hz,” check measured reviews.
Real-world note: a sub that claims 40 Hz but is only 40 W will sound thin in large rooms — prioritize watts and driver size as well as frequency spec.
Noise floor and codecs
SNR: >80 dB is acceptable; 90+ dB is preferable for quieter backgrounds and better clarity.
Supported codecs: require Dolby Digital and DTS at minimum. Prefer HDMI eARC (or at least ARC) if you want passthrough for multichannel PCM or Atmos-capable systems.
Optical: fine for basic 5.1 Dolby Digital, but won’t support high-bitrate object formats or uncompressed PCM.
Wireless link, latency and type of “wireless” rears
Latency target: <40 ms is generally unnoticeable; <20–30 ms is better for gaming and lip‑sync.
Wireless rears: verify whether the rears are active (powered) and connect wirelessly to the bar/sub, or are passive satellites that rely on a wireless adapter. Active wireless satellites are simpler and more reliable; adapters add complexity and potential latency.
Real example: a Vizio M‑Series 5.1 package uses powered satellites that connect wirelessly to the sub, which is preferable to passive speakers with separate transmitter boxes.
Connectivity and ergonomics
Minimum: one HDMI ARC/eARC, one HDMI IN (or more), optical input, Bluetooth. Extra HDMI inputs are useful if your TV has limited ports.
App vs onboard controls: app-based EQ and firmware updates are valuable; full automatic room calibration is rare in budget gear but a big plus if available.
Physical ergonomics: check remotes, wall-mount brackets, speaker power leads for the rears (some require mains power).
Quick shopping tip: prioritize a true 5.1 layout with powered wireless rears, a sub with 50–150 W RMS and HDMI eARC if your budget allows — otherwise accept 3.1/2.1 and compensate with a bigger sub. Next up: concrete placement and tuning steps that make these specs perform in your room.
4
Room setup, placement and acoustic tuning for best results
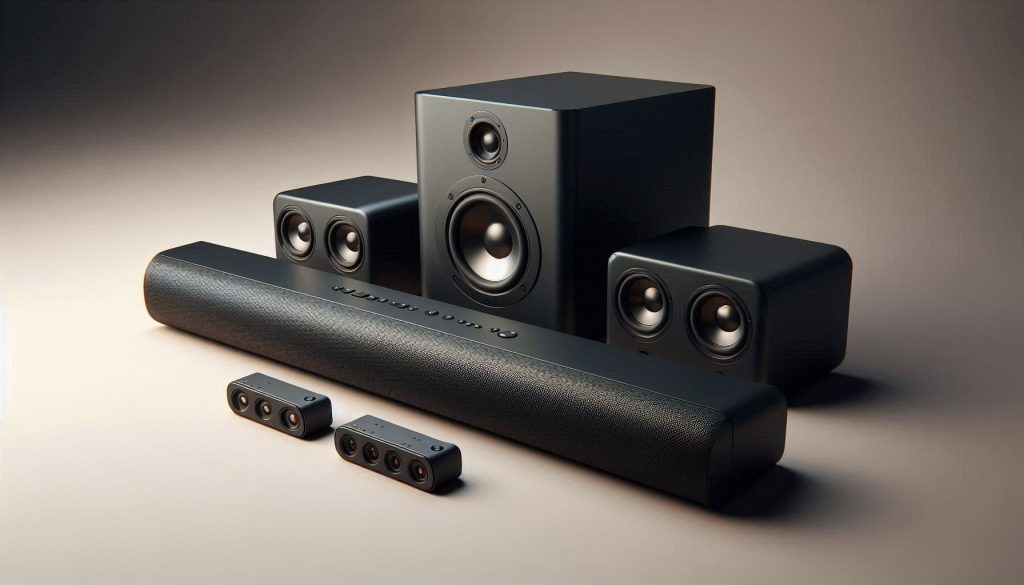
Budget soundbar, wireless rear speakers, and subwoofer shown in proper arrangement to illustrate placement and orientation for optimal audio performance.
After you buy, correct placement and simple tuning will deliver the biggest measurable improvement. Follow these step‑by‑step, practical instructions.
Soundbar relative to the TV
Position the soundbar centered under (or above) the TV, no more than 10–15 cm offset horizontally.
Keep the bar aligned with the screen’s acoustic axis—if the bar has a dedicated center channel, center it with the screen for clean dialogue.
Avoid placing the bar inside a closed cabinet. If it must sit in a cabinet, leave the door open when listening.
Wireless rear speaker placement, height and toe‑in
Aim for the surrounds at roughly ear height when seated (about 90–120 cm), or 20–30 cm above ear height if mounting on the wall.
Place them slightly behind the listening position, at ~90°–110° relative to the screen for discrete surround cues; in narrow rooms, move them closer to 70°.
Toe the speakers inward 10°–20° toward the main listening position to tighten imaging.
Example: Vizio M‑Series powered satellites work well 1–2 m behind you and 1 m above ear level; JBL Bar 5.1 detachable rears are easy to place at chair height if you want more direct surround.
Subwoofer crossover and level
Start with a crossover at 80 Hz (industry standard). If your satellites can reach lower (spec’d to ~60–80 Hz), try 60–80 Hz.
Set level by ear, then refine: play movie bass content and reduce/increase the sub until bass blends—not boomy, not missing.
If your sub has phase or polarity, flip it if bass cancels at the listening spot.
Balancing channels with pink noise and SPL
Use a pink-noise track (YouTube or app) and a smartphone SPL app (approximate but repeatable).
At the main listening position play pink noise and measure each speaker’s SPL. Adjust channel trims so each speaker reads the same dB (target ~75 dB for home listening).
Re-check with program material; small tweaks by ear are normal.
Room reflections, treatments and quick tuning
Hard reflective surfaces create glare—add rugs, curtains or a bookshelf to mid/high frequency tame reflections.
For boomy low end, try moving the sub 30–60 cm; corners increase output, walls too close can cause peaks.
Many budget systems include a simple “room” or “night” EQ—use it conservatively.
Minimizing wireless interference and latency
Keep wireless rears within line‑of‑sight of the sub/module if possible and away from Wi‑Fi routers and microwaves.
Use 5 GHz links if the system supports them; split congested 2.4 GHz networks or change channel on your router.
If you notice lip‑sync lag, enable TV/game mode, update firmware, or use wired connections (HDMI/eARC or optical) for the main feed where possible.
5
How to compare models and assemble a shortlist within your budget
Compare and shortlist budget soundbar systems: clean, realistic visualization of multiple soundbars, rear satellites, and subwoofers.
Scoring framework (repeatable, 100‑point system)
Use a simple weighted score so comparisons stay objective. Assign 0–10 for each sub‑item, multiply by the weight, then total.
Warranty & support (weight 5): length, included service, firmware updates
User interface & remote/app (subjective, weight 10): ease of setup, app stability, EQ controls
Price/value (weight 10): relative to competing models
How to apply it, step by step
Pick 5–7 candidates from retailers and manufacturer sites.
Score each category using spec sheets and hands‑on experience (0–10).
Multiply scores by weights and rank by total.
Cut to a shortlist of 2–3 models, then test in person or verify return policies.
A quick rule: if two models tie, prefer the one with better measured bass or better connectivity.
Balancing tradeoffs in practice
Decide your listening priorities up front. If you watch action movies, favor stronger sub performance and an actual powered sub over sophisticated virtualization. If you mostly watch dialogue-heavy shows, prioritize clear center-channel/voice reproduction and simple EQ. Example: giving up a little surround imaging for a real 5.1 satellite + sub often yields more tangible immersion than a “virtual” 3D mode on cheaper bars.
Use third‑party measurements and crowd wisdom
Cross‑check specs with independent labs: Rtings, What Hi‑Fi, and Sound & Vision provide frequency response, distortion and latency data. Read verified user reviews on Best Buy/Amazon and scan forums (Reddit r/hometheater) for recurring issues — firmware bugs or dropped rear connections show up quickly in consumer reports.
Three‑tier buying strategy (sample)
Value: prioritize included wireless rears and sub, simple setup, and returnable purchase (example: Vizio M‑Series M51a).
Best‑balanced: slightly higher price for better measured bass, HDMI/eARC and stable app (example: JBL Bar 5.1 or equivalent).
Stretch: allocate extra for build quality, firmware support and optional upgrade paths (wireless rear kits or compatible speakers); expect better DACs and room correction.
Use the scoring framework to place any candidate into one of these tiers and you’ll have a practical shortlist ready for final auditioning.
6
Common setup problems, troubleshooting and long-term maintenance
Budget soundbar, wireless rear speakers, and subwoofer shown in clean, hardware-focused view to illustrate inspection, troubleshooting, and maintenance.
Quick diagnostic checklist
When something goes wrong, run this fast checklist first — it solves most issues:
Power-cycle soundbar, wireless sub/rears and TV (unplug 30 seconds).
Move rears within line-of-sight of the soundbar during pairing.
Confirm TV output (HDMI/eARC vs. ARC vs. optical) and set TV audio format to PCM if testing.
Open the manufacturer app and check firmware/version numbers.
Swap inputs/cables to isolate source vs. speaker problem.
Dropouts and pairing failures
Dropouts usually come from RF congestion or pairing errors. Try these steps:
Re-pair using the official procedure: put rear speakers and base in pairing mode, keep them adjacent until connected.
If available, use a wired rear kit or dedicated wireless bridge (example: some Vizio and JBL models offer a USB/bridge dongle).
Factory-reset the bridge: unpair in app, unplug bridge and speakers 30s, power bridge first, then re-pair.
Lip‑sync and mismatched levels
Latency and level mismatches are solvable without tech shops:
Fix lip‑sync by enabling TV/receiver AV sync adjustments (±ms) or the soundbar’s delay control.
Use built‑in calibration or test tones to set rear levels. Aim for rears about 3–6 dB below the center for movies.
If test tones aren’t available, use a smartphone SPL app and compare positions.
Firmware updates and safe resets
Always update firmware when issues persist:
Update via the official app or USB per manual. Do not power off during update.
Back up settings if the app allows, then perform a factory reset only if updates and re-pairing fail.
Physical maintenance and aging hardware
Battery care: follow manufacturer guidance; for rechargeable rears, avoid full deep discharge cycles and remove batteries if storing long-term.
Cleaning: dust drivers and vents, avoid solvents and liquid contact, and keep cloth grilles clean to prevent voice‑coil rubbing.
Age warning signs: rising distortion, reduced battery runtime, persistent dropouts — these often indicate failing drivers or RF hardware and justify replacement.
If these steps don’t restore reliable performance, the Conclusion will explain whether to pursue professional calibration, repair, or replacement and how to protect resale value when you upgrade.
Making the most of a budget wireless rear soundbar system
You can achieve credible surround and clearer dialogue without overspending if you prioritize driver configuration, wireless latency and reliable subwoofer integration. Focus on models with discrete rear channels, low-latency wireless links, DSP options and room calibration. Position rears at ear level, maintain symmetry and use built-in EQ or app-based tuning to reduce reflections and balance tonal response.
When comparing models, weigh measured performance, update history and customer support alongside price. Test with familiar content, confirm lip-sync and multiroom behavior, expect modest compromises in bass depth or imaging versus high-end setups. With careful selection, placement and recalibration, your system will deliver meaningful surround immersion and clearer speech.