
Upgrading your home theater doesn’t require a brand-new television; learning how to connect a soundbar to an older TV without HDMI can instantly transform your viewing experience. While modern setups rely on HDMI ARC or eARC, legacy televisions offer a variety of reliable alternatives like optical (TOSLINK), RCA, and 3.5mm auxiliary outputs.
By utilizing these ports, you can connect a soundbar using these legacy connections and bypass thin, tinny internal speakers to achieve crystal-clear dialogue, deeper bass, and a much wider soundstage. Many homeowners are surprised to discover just how easy it is to connect a soundbar to a vintage display — no adapters or technical expertise required in most cases. Whether you are dusting off a classic plasma screen or a reliable LED model, bridging the gap between vintage hardware and modern audio technology is simpler than it seems. Once you connect a soundbar, even your oldest television can deliver an immersive, cinema-quality audio experience right in your living room.
Navigating the world of analog vs. digital audio connections is the key to choosing the right setup when you want to connect a soundbar to your space. This guide explores the best methods for direct wiring, using digital-to-analog converters (DACs) for mismatched ports, and even implementing wireless Bluetooth transmitters for a cable-free look.
Whether you choose to connect a soundbar via optical cable, RCA, or a Bluetooth transmitter, we will break down the technical trade-offs — such as managing signal latency and understanding why some connections support surround sound while others are limited to stereo — to ensure you get the highest fidelity possible. With the right adapters and a few simple configuration tweaks, you can connect a soundbar to virtually any older television without sacrificing audio quality. Armed with this knowledge, you will have everything you need to connect a soundbar confidently, breathe new life into your “old” TV, and enjoy a cinematic audio experience today.
Why you should connect a soundbar to an older TV and what to expect
You’ll gain clearer dialogue, better bass, and higher perceived volume when you connect a soundbar to an older TV. Expect substantial improvement for movies and speech, but realistic limits: legacy outputs (RCA, optical on some sets, coaxial, or headphone jacks) can restrict dynamic range and surround formats. This guide compares DIRECT WIRED, adapter/converter, and wireless options so you can connect a soundbar by weighing cost, complexity, and sound quality to find the perfect fit for your setup.
How to Connect a Soundbar to Your Older TV
You’ll get step-by-step wiring, configuration, and testing instructions to help you connect a soundbar seamlessly, plus troubleshooting tips and advanced trade-offs. If needed, know when a professional install makes sense — especially for complex converters or wall-mounted setups where attempting to connect a soundbar on your own may require extra guidance. Read on to decide.
Identify your TV’s audio outputs and your soundbar’s inputs
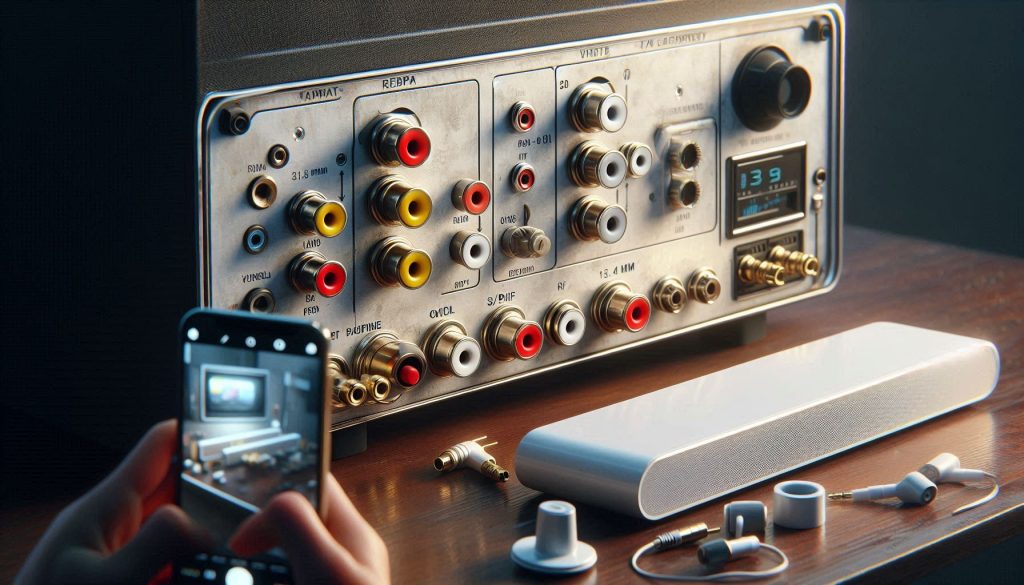
Scan and document — don’t guess
Before buying anything, take a quick photo of the back and side panels of your TV and your soundbar — this will help you determine the best way to connect a soundbar to your specific setup. Look for labels like “Audio Out”, “Headphones”, “Optical”, “Coax”, “SPDIF”, or icons (a headphone, square optical port). Also check the TV manual or model page (e.g., “Samsung UN32J4000 — optical out” or “Sony Bravia KDL‑32 — RCA stereo out”) to confirm capabilities and ensure you have everything you need to connect a soundbar using the right cable or adapter the first time.
Common outputs you’ll find
Identify your soundbar inputs
Read the soundbar label or manual. Typical inputs: optical (e.g., Yamaha YAS-109), 3.5mm/aux, RCA, and occasionally coaxial. Some bars accept only HDMI — a key compatibility blocker for older sets.
Analog vs digital — what they carry
Quick, practical tests to confirm active ports
Prioritize compatibility
Make a short matrix: TV port → soundbar input → expected audio (stereo/5.1) and note whether a converter or breakout cable is needed (e.g., SCART → RCA) to successfully connect a soundbar to your older TV. With this inventory you’ll know which connection paths are viable and which will give the best fidelity as you move to wiring and adapters. Use this compatibility map as your go-to reference every time you need to connect a soundbar with confidence, saving you time, money, and guesswork at every step.
Direct wired connections: practical instructions for analog and legacy digital
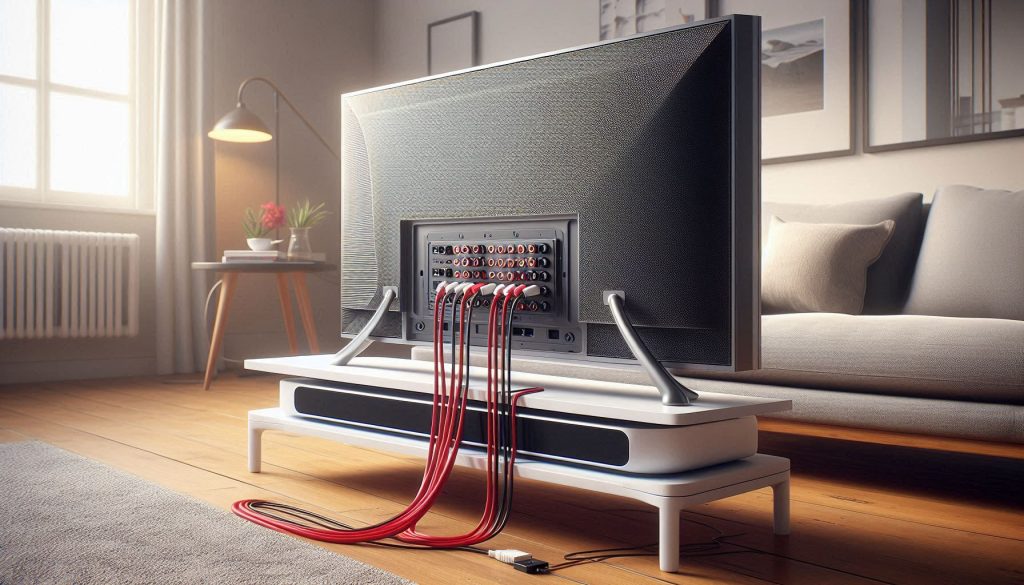
If your TV and soundbar share a compatible physical port, wired is the most reliable path. Below are step-by-step instructions, wiring diagrams, cable tips, and what each path can actually carry.
RCA (TV RCA out → soundbar RCA or RCA→3.5 mm)
3.5 mm headphone/line out → AUX
Optical (TOSLINK)
Coaxial S/PDIF (RCA-style)
General practical tips:
Next, if the ports don’t match, the following section shows reliable adapters and converters to bridge the gap.
Using adapters and converters when ports don’t match
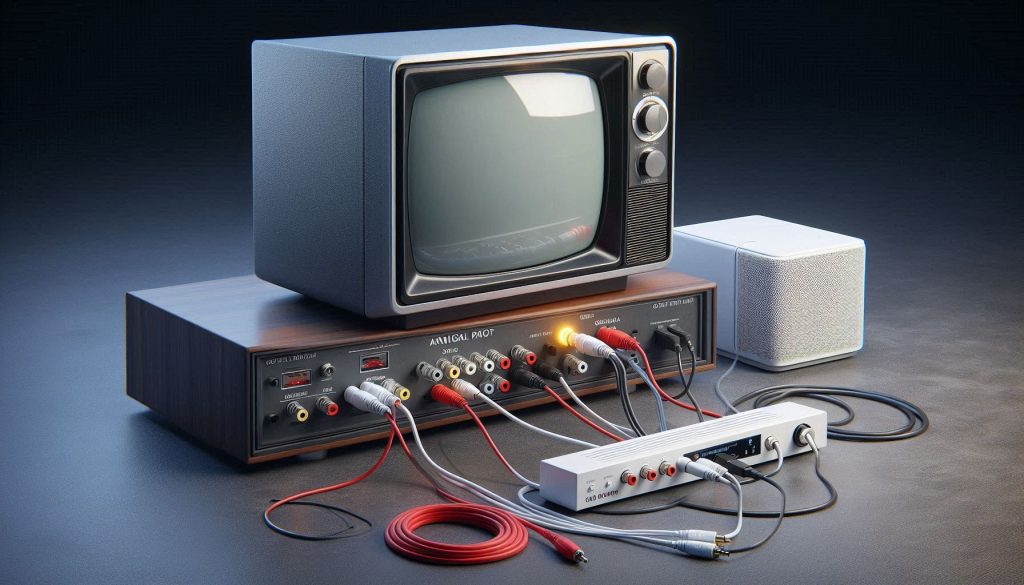
When the physical jacks don’t line up, adapters and converters bridge the gap and make it possible to connect a soundbar even when ports don’t match — but they’re not interchangeable. Below you’ll find how to pick between passive adapters and active converters, what to expect when converting digital→analog (and analog→digital), and practical tips to avoid common problems as you connect a soundbar to your older TV without compromising on sound quality.
Passive adapters vs active converters
Choosing a DAC / ADC: specs to check
Look for:
Example products:
Wiring examples and practical notes
When converting digital→analog expect:
Avoiding pitfalls
Next, you’ll get a hands‑on setup, configuration, and testing checklist to make the connection reliable and trouble‑free.
Wireless alternatives: Bluetooth and external transmitters

If running cables is impractical or your TV lacks usable outputs, wireless transmitters offer a practical alternative to connect a soundbar without the hassle of cable management. Below are the real-world options, how to pair them, and what to expect for latency, range, power, and audio quality.
Bluetooth basics and codec trade‑offs
Bluetooth A2DP is the common profile for TV audio. Codecs matter:
Tip: aptX LL only helps if both ends advertise aptX LL. Many soundbars advertise “Bluetooth” but only support SBC; check specs before buying.
Example products: Avantree Oasis/HT418 (low‑latency, optical/3.5 mm support), Creative BT‑W3 (USB/3.5 mm dongle options), Avantree DG80 (USB dongle marketed for TVs/PCs).
Pairing in the real world
Minimizing lip‑sync and interference
How to measure lip‑sync: play a video with a clear start (clap or spike) and watch/record with a phone; note audio vs visual offset. To reduce delay:
Range, power, and real‑world quality
When fidelity or multichannel surround matters, wireless will usually degrade quality compared with direct wired connections when you connect a soundbar — due to lossy codecs, possible dropouts, or limited channels. Move on to the step‑by‑step setup and testing checklist to apply these choices practically and connect a soundbar using the wired method that delivers the highest fidelity for your specific TV and audio setup.
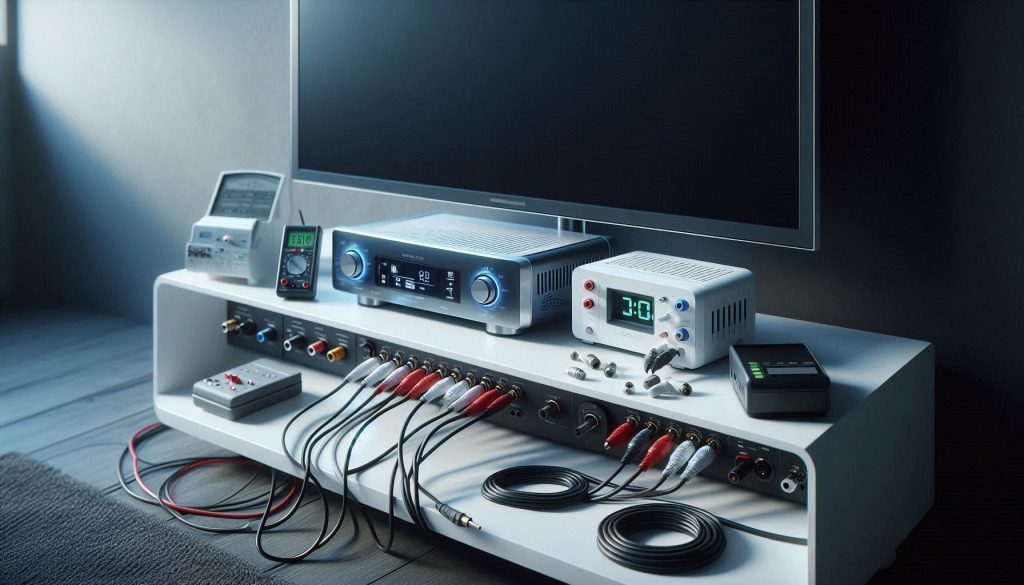
Step-by-step setup, configuration, and testing checklist

Prioritized preflight checklist
Power and grounding recommendations
Initial TV audio settings (set these first)
Soundbar selection and modes
Objective testing routine
Quick fixes & troubleshooting decision‑tree
Follow this checklist step by step and you’ll resolve most common problems without specialist tools.
Advanced considerations, trade-offs, and when to call a professional
After you’ve tried the practical setups, use these notes to weigh compromises and decide whether to upgrade or call a technician.
Analog trade‑offs: noise floor and dynamic range
When you connect a soundbar via analog (RCA/3.5 mm) from an older TV, expect a higher noise floor and reduced dynamic contrast versus modern digital outputs. Cheap TV DACs and long unshielded runs can introduce hiss or subtle distortion during quiet scenes when you connect a soundbar using low-quality or unshielded cables. If you hear hiss at normal listening levels, test with a different short, shielded cable (Monoprice or AmazonBasics) before assuming hardware failure — a simple cable swap is often all it takes to connect a soundbar cleanly and eliminate unwanted noise for good.
Digital adapters and channel truncation
When you connect a soundbar via optical or coax, many adapters and older TV optical outputs will only send stereo PCM or a single‑channel Dolby Digital bitstream. That means multi‑channel formats (Dolby Digital Plus, DTS:X) will be downmixed or not passed through when you connect a soundbar using these legacy digital connections. If you need discrete surround, you’ll either need a decoder-capable soundbar or an AV receiver — two options worth researching thoroughly before you connect a soundbar to any older display. Example: a common FiiO D3 converter will deliver stereo/PCM reliably but won’t magically restore Dolby Atmos — so choose your hardware wisely before you connect a soundbar to ensure your setup matches your surround sound expectations.
DSP, EQ and perceived improvement
Soundbar DSP modes (Virtual Surround, Night mode) can widen soundstage but often compress dynamics or boost mid/bass, changing timbre. Use “Stereo”/“Direct” modes for accurate testing, then enable DSP sparingly. A subtle EQ tweak is often more effective than aggressive preset modes.
Cable quality thresholds
For runs under ~3 m, well‑shielded budget cables perform nearly as well as boutique brands when you connect a soundbar to an older TV — making expensive cables an unnecessary investment for most setups. Premium cables yield diminishing returns unless you’re correcting interference or using very long runs. For optical, TOSLINK is forgiving when you connect a soundbar this way — just avoid bent cables and cheap, damaged connectors to maintain a clean, reliable signal.
Power, grounding, and hum
Always plug TV, soundbar, and converters into the same outlet or surge protector to reduce ground loops. If you hear 50/60 Hz hum, try ferrite clips on cables, or a ground‑loop isolator on analog lines. Use powered (not passive) converters to maintain signal levels.
Signal‑chain complexity and latency
Each converter, wireless link, or DSP stage can add latency. Delays under ~30–40 ms are usually tolerable; beyond that lip‑sync becomes obvious. If you add wireless transmitters, check manufacturer latency specs or use a wired path for video‑critical content.
When to call a professional — and what to bring
Call a pro for AV receiver integration, multi‑room routing, custom subwoofer phase tuning, persistent lip‑sync issues, or hidden in‑wall wiring. A technician will ask for: TV and soundbar models and firmware, converter/cable models, photos of connections, a clear description of symptoms, and steps you’ve already tried (including tests and measured delays). Providing that makes diagnosis fast and cost‑effective.
Proceed to the Conclusion for final guidance on choosing the most reliable path forward.
Make a reliable connection that matches your priorities
You now have a systematic framework to connect a soundbar to an older TV without HDMI: identify outputs and inputs, prefer direct wired paths, use quality converters when needed, use wireless only when necessary, and follow a structured setup and testing routine.
Use the trade-off guidance to connect a soundbar using the option that best balances audio fidelity, convenience, and cost for your specific setup. If you hit persistent issues, revisit the checklist and consider professional help when troubleshooting exceeds your tools or time — especially if this is your first attempt to connect a soundbar using adapters or converters. Test thoroughly, document settings, and choose the simplest reliable solution that meets your listening priorities today, knowing you have everything you need to connect a soundbar with confidence and enjoy a dramatically improved audio experience.