
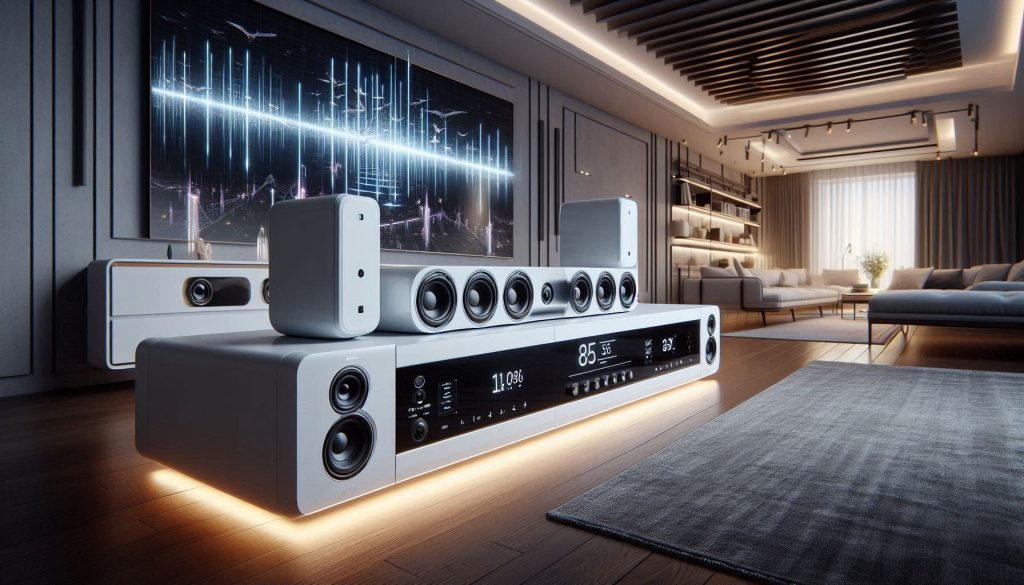
Upgrading your home entertainment with affordable Dolby Atmos doesn’t have to cost a fortune. However, finding the best options requires balancing technical specs with real-world performance. Modern budget-friendly models utilize upward-firing drivers and advanced digital signal processing (DSP) to create a convincing three-dimensional soundstage.
By focusing on essential features like HDMI eARC support, driver count, and dedicated subwoofers, you can achieve cinematic spatial imaging and clear dialogue that far surpasses built-in TV speakers — without overspending.
This guide breaks down the top-rated options that deliver the best value for money. Whether you’re a movie buff, a competitive gamer, or a music lover, we analyze objective data including frequency response, low-end extension, and room calibration tools — helping you distinguish genuine audio quality from clever marketing. You’ll also find practical advice on installation, troubleshooting, and optimizing your room’s acoustics to get the most from your setup.
How Dolby Atmos Works in Soundbars and What That Means for You
Object-based audio vs. channel-based audio
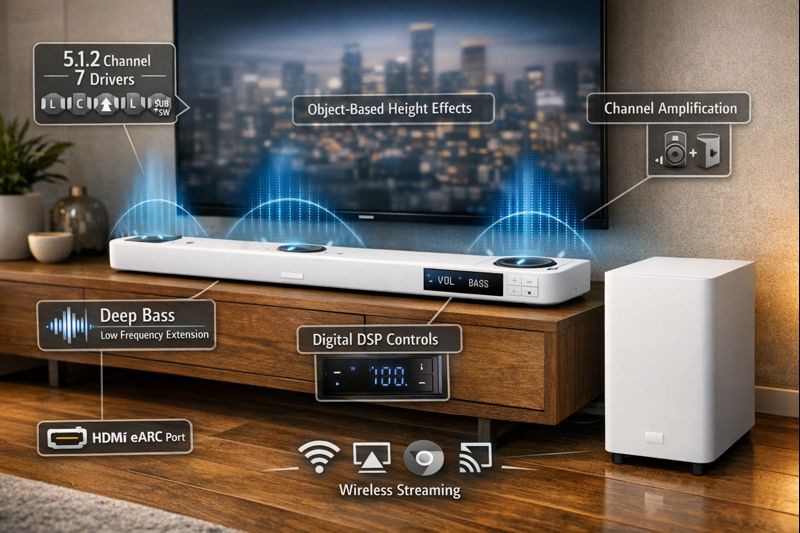
Dolby Atmos treats sounds as “objects” with 3D coordinates instead of tying them to fixed channels (left/right/center). For you, that means audio elements—raindrops, helicopters, overhead dialogue—are located in space and decoded to whatever speakers are available. In a soundbar, the decoder maps those objects to the physical drivers and any virtual processing the bar can simulate.
Up-firing drivers and virtual height processing in dolby atmos soundbars
There are two practical approaches in soundbars:
When comparing Dolby Atmos Soundbars, look for features that enhance sound quality and immersive experiences. If you want convincing overhead effects, physical up-firing drivers or detachable rear modules are generally superior; virtualization is cheaper and can be surprisingly good in the right room but is more room-dependent. The best Dolby Atmos Soundbars will offer a balance of both physical and virtual height solutions to suit different room types and budgets.
Signal decoding and passthrough
Check whether the soundbar decodes Atmos internally or simply passes Dolby TrueHD/Atmos from a source to your TV/receiver via HDMI eARC/ARC. Actionable checks:
How room acoustics affect perceived height
Ceiling height, material, and room shape change reflections. A low, flat drywall ceiling (8–9 ft) favors up-firing drivers; vaulted or very tall ceilings reduce bounce and demand physical overhead speakers or better virtualization. Soft ceilings absorb reflections; hard ceilings reflect them.
Data-driven indicators to trust — how to separate marketing from reality
Choosing the right dolby atmos soundbars can make all the difference in your home theater setup.
With these criteria for dolby atmos soundbars in mind, you’ll be ready to compare affordable models based on real capability and sound immersion.
Choosing an Affordable Dolby Atmos Soundbar: Key Specs and Purchase Criteria
When you shop for a budget Atmos bar, focus on measurable specs and real-world trade-offs so your purchase matches how you actually use it. Below are the practical factors to check and how they affect listening in your room.
Driver count and layout
Count physical drivers, not marketing channels. Up‑firing drivers or detachable rear satellites create more reliable height cues than purely virtual systems. For example, the Vizio M51a‑H6 uses dedicated up‑firing elements and an external sub for clearer overhead effects; the Sonos Beam (Gen 2) relies on virtual height processing and excels in small rooms.
Subwoofer: internal vs. external
External subwoofers give deeper, cleaner bass and avoid vibration in the bar—important for movies and music. Internal subs save space but usually lack low‑end extension and headroom. If you want chest‑punching LFE, prioritize models with an included or optional wireless sub.
Power output and headroom
Look for RMS/total system watts and whether amps are dedicated per channel. Higher continuous power and separate amplification reduce distortion at loud levels. Cheap Dolby Atmos Soundbars often sound good at normal volumes but clip during dynamic movie scenes.
Frequency response and low‑end extension
A reported low‑frequency number (e.g., 40 Hz) is useful—lower is better for effects. Measured reviews are more reliable than spec sheets. If manufacturers don’t list it, assume limited bass and plan for an external sub.
Codecs and HDMI eARC/ARC
HDMI eARC support is critical for true high‑bitrate Atmos passthrough (Dolby TrueHD/Atmos). If your setup includes a streaming stick through the TV, ensure the bar either decodes Atmos or passes it via eARC.
DSP, upmixing, and latency
Test or read reviews for how natural the upmixing is; cheap DSP can create tiring harshness. Gamers should check HDMI latency and game modes—low‑latency passthrough matters.
Wireless connectivity and multiroom
Wi‑Fi + AirPlay/Chromecast enables higher-quality streaming and updates; Bluetooth is convenient but lower quality. If you plan multiroom audio, confirm ecosystem compatibility.
Use these criteria to filter models quickly. Next, we’ll apply them to identify the best overall value picks so you can see which specific bars meet each priority.
Physical footprint and warranty/support
Explore how different environments affect the performance of dolby atmos soundbars and choose wisely.
Measure available space and check mounting options. Compare warranties—longer coverage and responsive support matter more in budget buys.
Common trade-offs and decision matrix
Use these criteria to filter models quickly; next, we’ll apply them to identify the best overall value picks so you can see which specific bars meet each priority.
Top Overall Value Picks: Affordable Soundbars That Best Balance Price and Atmos Performance
Below are compact, budget-friendly Dolby Atmos soundbars that consistently deliver the most audible performance per dollar. For each pick, you get strengths, what to check in the specs, ideal room size/view distance, main compromises, and who benefits most.
Below are compact, budget-friendly Dolby Atmos soundbars that consistently deliver the most audible performance per dollar. For each pick you get strengths, what to check in the specs, ideal room size/view distance, main compromises, and who benefits most.
Vizio M51a‑H6 — Best true Atmos bang for the buck
Why it stands out: Dedicated up‑firing drivers plus a wireless sub make real height and punchy LFE affordable; measured reviews show wide soundstage for the price. For movie fans exploring Dolby Atmos Soundbars, this is one of the strongest value propositions on the market. Key specs to watch: 5.1.2 layout, included wireless 8″ sub, HDMI eARC. Ideal room/viewing distance: Small-to-medium living room, ~8–15 ft. Primary compromises: DSP can be a bit bright at high volumes; remote/app UX is basic — minor drawbacks that are common across mid-range Dolby Atmos Soundbars.
Who benefits:
Movie fans who want convincing overhead effects without adding rear speakers. Pros: Strong bass with sub, real height drivers, great price. Cons: Slightly aggressive treble at loud volumes; limited streaming ecosystem. Use-case: Weekend action movies and family TV nights, where Dolby Atmos Soundbars with true height drivers and wireless subwoofers genuinely shine. If you’re comparing Dolby Atmos Soundbars in this price bracket, the 5.1.2 layout and included wireless 8″ sub make this a difficult option to overlook.
Sonos Beam (Gen 2) — Best compact Atmos experience
Why it stands out: Excellent dialogue clarity and musicality in a very small footprint; virtual Atmos processing feels natural in small rooms.Key specs to watch: Virtual Dolby Atmos decoding, HDMI eARC, AirPlay 2.Ideal room/viewing distance: Small rooms/bedrooms, ~6–12 ft.Primary compromises: No included sub (optional), less immersive in large rooms.Who benefits: Apartment dwellers and music-first users who want a sleek, easy setup.Pros: Superb voice/tonal balance, seamless app/ecosystem.Cons: Pricier after adding a sub; height is virtual, not physical.Use-case: TV bingers and audiophile-minded listeners in small spaces.
Samsung HW‑Q700A — Balanced home‑theater features
Why it stands out: Solid 3.1.2 performance, punchy midbass, and good dialogue clarity; often bundled with useful features on sale.Key specs to watch: 3.1.2 layout, wireless sub (model-dependent), HDMI eARC, game mode.Ideal room/viewing distance: Medium rooms, ~10–18 ft.Primary compromises: Less resolution than premium bars; occasional boominess without EQ.Who benefits: Mixed-use rooms — movies, games, and TV.Pros: Good all-rounder, strong dynamic headroom.Cons: Can need EQ tuning; app features vary.Use-case: Family rooms where games and films share the TV.
Polk Signa S4 — Budget with surprising scale
Affordable entry to Atmos-style immersion with an included subwoofer and wide dialogue focus. Key specs include a 3.1 configuration with up-firing elements, an included subwoofer, and HDMI eARC — ideal for small to medium rooms at roughly 8–14 ft viewing distance. The main compromise is that the height illusion is less distinct than true upward-firing drivers.
Cost-conscious buyers who still want deeper bass and clear speech will find good value here. The bar is very affordable with decent out-of-box bass, though height effects are more virtual and advanced features are limited. Best suited to apartments and secondary TVs where the included subwoofer and HDMI eARC support make it a solid pick without the premium cost.
Next you’ll use these picks against your priorities (space, bass needs, and streaming) to decide which model matches your setup.
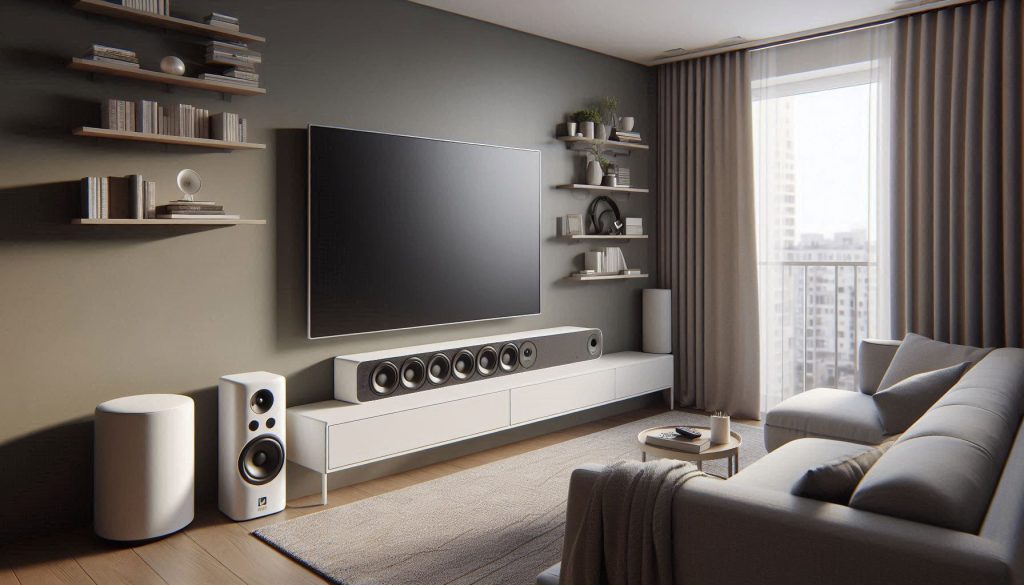
Best Compact and Space-Sensitive Options for Small Rooms or Apartments
How small soundbars create Atmos-like height
When manufacturers shrink Dolby Atmos Soundbars, they compensate with DSP, angled/forward-firing drivers, and psychoacoustic tricks (beamforming and time-delay cues). Up‑firing drivers are often tilted and paired with digital height virtualization so reflections and timing cues create the perception of “overhead” sound even in a slim enclosure.
In tight rooms this can be surprisingly effective with Dolby Atmos Soundbars — but it relies on controlled reflections and correct placement.
What shrinks and what stays believable
You should expect trade-offs as cabinet size goes down:
Still, dialogue clarity, immersive height illusions, and a wide soundstage are achievable in small rooms if you manage placement and add a sub.
Practical placement: width, wall vs shelf, ceiling height
Why a wireless subwoofer still matters
Even compact bars benefit from a separate sub:
Selection checklist and quick tips
With careful placement and a compact wireless sub, you can get convincing height effects without overwhelming a small apartment.
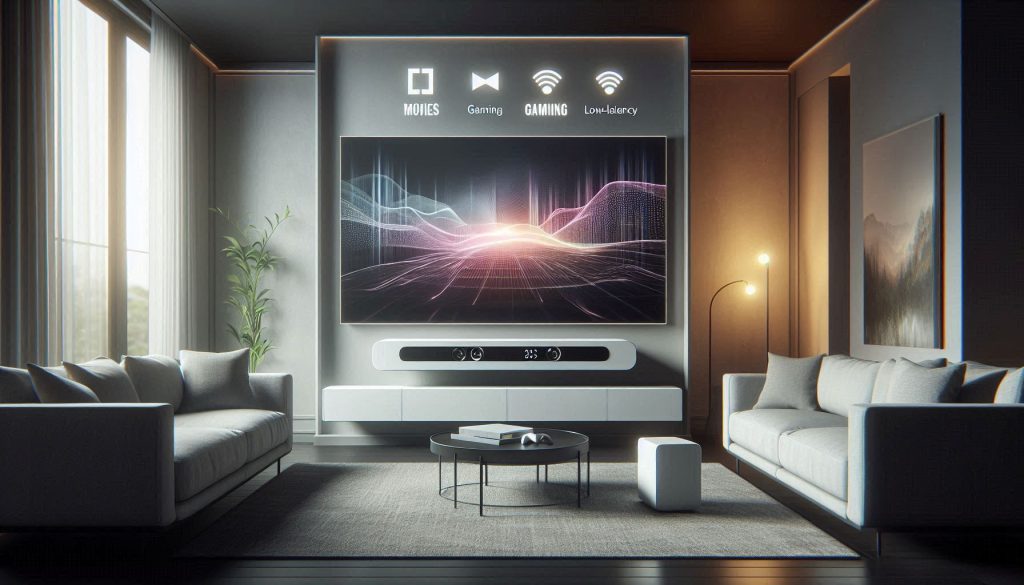
Choosing the Right Soundbar for Movies, Gaming, or Music: Use-Case Recommendations

Different listening habits demand different strengths. Below are practical, data-driven trade-offs and fast configuration recipes so you can either optimize a single affordable Atmos bar for mixed use or pick a model tuned to your dominant use-case.
Movies and TV: prioritize dynamics, stage, and dialog
For cinematic impact pick bars with large driver arrays or a dedicated wireless sub. Aim for models with good peak SPL and wide stereo/height staging.
Gaming: low latency, directional cues, and punch
Gaming needs low input lag and sharp transients. If you play competitively, time (ms) matters — target total audio latency <20 ms.
Music: neutrality, imaging, and streaming quality
For music you want flat voicing, precise stereo imaging, and high-bitrate codecs where possible.
Quick mixed-use profile (one-bar setup)
Next, we’ll translate these settings into practical placement and calibration steps — the installation and tuning choices that make the biggest audible difference.
Installation, Calibration and Troubleshooting to Get Real Dolby Atmos Results
Place the soundbar centered under the TV on a low console or wall-mounted no more than 6–12 inches below the screen. If the bar has upward-firing drivers, leave clear space above and avoid shelving directly overhead — these drivers need an unobstructed ceiling bounce path, ideally with a ceiling height of 8–12 ft.
For subwoofer placement, use the sub crawl: sit in your listening spot, play a bass-heavy track, then place the sub where you normally sit and crawl the room’s perimeter to find where bass sounds most even. Move the sub there. Avoid corners if bass sounds boomy — try starting 1–2 ft from a front wall instead.
Calibration: room tools and manual tuning
Start with the bar’s automatic room-calibration (microphone-based systems like Sony/Denon/ Samsung’s Auto EQ). Use auto-EQ to establish crossover, distance, and levels, then refine manually:
If you’re in a live-test mood, Sonos Trueplay or the soundbar’s mic EQ will change results; prefer manual tweaks if room reflections are unusual.
HDMI / eARC configuration to preserve Atmos metadata
Use an eARC-capable HDMI port and an Ultra High Speed (HDMI 2.1) cable when possible. On TV and source:
Remember that streaming apps deliver Atmos via Dolby Digital Plus, while Blu-ray uses Dolby TrueHD and requires eARC. With careful placement and simple calibration, you’ll unlock convincing Atmos cues, clearer dialogue, and tighter bass without a complex surround rig. Use test tones, manufacturer apps, and modest EQ adjustments, then validate with clearly labeled Atmos content — look for the Atmos badge on Disney+, Apple TV+, and Netflix, or use official Dolby demo tracks. Pay attention to how each model handles height virtualization and lossless format support through eARC, as these details separate a good experience from a great one.
Common problems and fixes
If basic fixes fail, update firmware and then contact manufacturer support with a list of tests you’ve run and your TV/soundbar model.
Next, you’ll use these calibrated results to finalize your purchase and room strategy in the conclusion.
Make an Informed Choice and Optimize Your Setup
Focus on objective specs when shopping — speaker channels, virtual height effects, driver configuration, HDMI eARC support, and firmware updates all matter. Match size and output to your room dimensions and seating: compact models suit apartments while larger units and optional subwoofers fill medium-sized rooms.
With careful placement and simple calibration, you’ll unlock convincing Atmos cues, clearer dialogue, and tighter bass without a complex surround rig. Use test tones, manufacturer apps, and modest EQ adjustments, then validate with content you know well. Pay particular attention to how each model handles height virtualization and whether it supports lossless audio formats through HDMI eARC — those details separate a good experience from a great one.
Choose confidently — an affordable option from today’s range of Dolby Atmos Soundbars can deliver real immersion and everyday gains with minimal fuss.