
You spend more than 2,000 hours a year watching video—make those hours unforgettable. A well-designed home theater setup provides more than just a screen; it delivers cinema-grade picture quality, immersive 3D sound, and the low-latency performance required for high-end gaming. Whether you’re streaming the latest blockbuster or diving into an expansive open-world game, small choices in display technology and room acoustics change what you notice and how you feel. By moving beyond basic “plug-and-play” components, you can transform a standard living room into a professional-grade theater that makes every viewing feel intentional rather than chaotic.
This guide helps you balance cutting-edge visuals—like high-performance QD-OLED panels and ultra-bright mini-LED displays—with advanced audio architectures like Dolby Atmos. We break down the technical trade-offs between high-lumen laser projectors and gargantuan flat panels, ensuring you choose the right display for your room’s ambient light. Beyond hardware, you’ll discover how AI-driven room calibration tools can optimize your soundstage without the need for bulky physical acoustic panels. Follow our expert recommendations to build a future-proof system that maximizes your budget and delivers a breathtaking cinematic experience for years to come.
Why a Thoughtful Home Theater Transforms Your Viewing
You spend more than 2,000 hours a year watching video — make those hours unforgettable. A well-designed home theater gives cinema-grade picture, immersive sound, and low-latency performance for gaming. It also makes streaming feel intentional instead of chaotic. Small choices in screen, speakers, and room treatment change what you notice and how you feel.
This guide helps you balance picture, sound, room design, budget, and future-proofing so you build a system that fits your priorities and space. Expect clear, practical recommendations for displays, audio systems, acoustics, sources, connectivity, and maintenance. You’ll get action steps and trade-offs so you can plan, buy, and maintain a home theater that performs for years.
Throughout the article you’ll find product ranges, budget tiers, and simple calibration tips so you can prioritize what matters most and avoid common costly mistakes for long-term enjoyment and upgrade paths too.
Display and Projection: Choosing the Right Screen
Flat-panel or projector — pick for your room
Decide first by room size and ambient light.
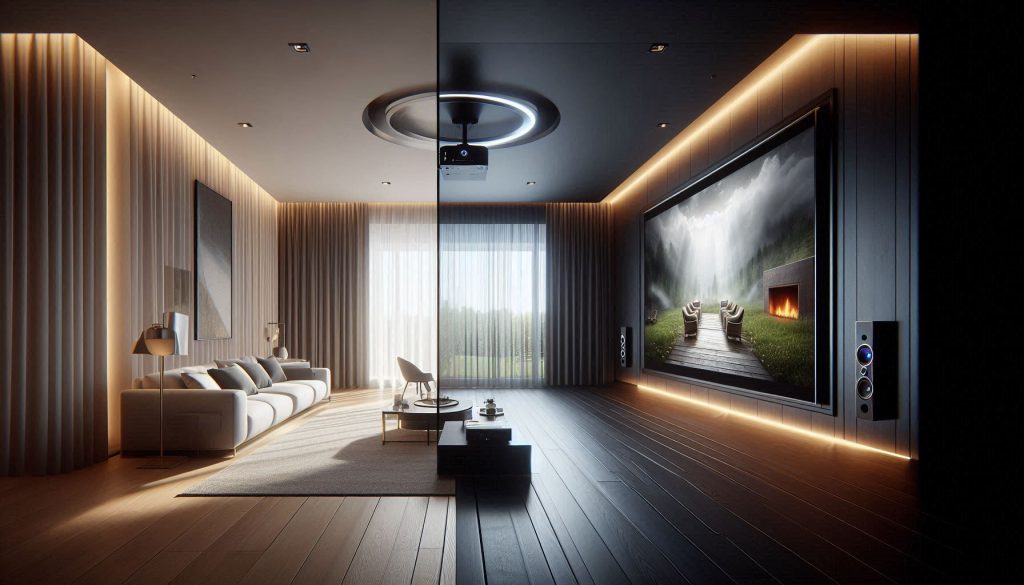
If you have a bright family room with lots of windows, a high‑brightness TV or Mini‑LED set (e.g., Samsung Neo QLED like the QN90-series) will outperform most projectors. If you want a true cinema feel and a screen larger than ~100″, a projector is the economical, immersive choice — provided you can control light.
Resolution and HDR: what to prioritize
Contrast, blacks, and when to choose each
If you crave deepest blacks and cinematic shadow detail, favor OLED or QD‑OLED for their pixel‑level dimming. If you need high sustained brightness (bright rooms, HDR specular highlights), prefer Mini‑LED or LED/LCD. Real tests beat specs—check lab measurements (Rtings, DisplayHDR) for native contrast and black level numbers.
Screen size and seating made simple
Measure your viewing distance and choose a diagonal so the screen fills roughly a 30–40° field of view. Quick rule:
Projector throw, screen gain, and UST decisions
Panel tech and motion
Next up: how to match this image performance with immersive audio so visuals and sound feel like one cohesive experience.
Audio Systems: Building Immersive Sound
Channel layouts and formats
You’ll choose between simple stereo, traditional channel surrounds (5.1, 7.1) and object‑based formats (Dolby Atmos, DTS:X). Object audio maps sounds in 3D: a true 5.1.4 or 7.1.4 system with dedicated height channels will deliver clearer overhead effects than most soundbars’ virtual processing.
Speaker types and when to use them
Floorstanding speakers (e.g., KEF R-series, B&W 700) give authoritative bass and dynamics in medium/large rooms. Bookshelf speakers (Elac Debut, Klipsch Heresy) are great for smaller rooms or as surrounds. In‑wall/on‑wall options cleanly integrate into custom rooms but require careful selection to match voicing.
Soundbars vs discrete systems
Soundbars (Sonos Arc, Sony HT‑A7000, Samsung HW‑Q990C) are compact and easy; choose if space or wiring is a constraint. Discrete systems provide better stereo imaging, true height channels, and upgrade paths. Think of a soundbar as a fast win; discrete speakers are the long‑term investment.
Subwoofer planning
A single quality sub (SVS SB‑3000, Hsu Research) is a start. Use two subs to even bass response and reduce room modes. Set crossover near 80 Hz for most systems, adjust phase and gain by listening and using room‑measurement tools (REW, SPL meter).
Amplifier power & speaker matching
Don’t chase peak watts—look for clean RMS power and headroom. For typical living rooms, 50–150 W/channel into 8Ω is ample; higher power helps dynamics and low distortion. Match amp capability to speaker sensitivity (speaker sensitivity ~86–92 dB/W/m): lower sensitivity needs more amplifier power.
Placement, toe‑in, and height‑channel strategies
Place left/right speakers at ear‑level tweeters, forming an equilateral triangle with your main seat. Center channel under/over screen with direct aim at ears. Surrounds should be slightly above ear level; Atmos heights can be ceiling speakers or upward‑firing modules. Toe‑in main speakers 10–20° for tighter imaging.
Quick prioritization for audible gains
Next, we’ll tune your physical room so that those speakers actually sound as good as they’re capable of.
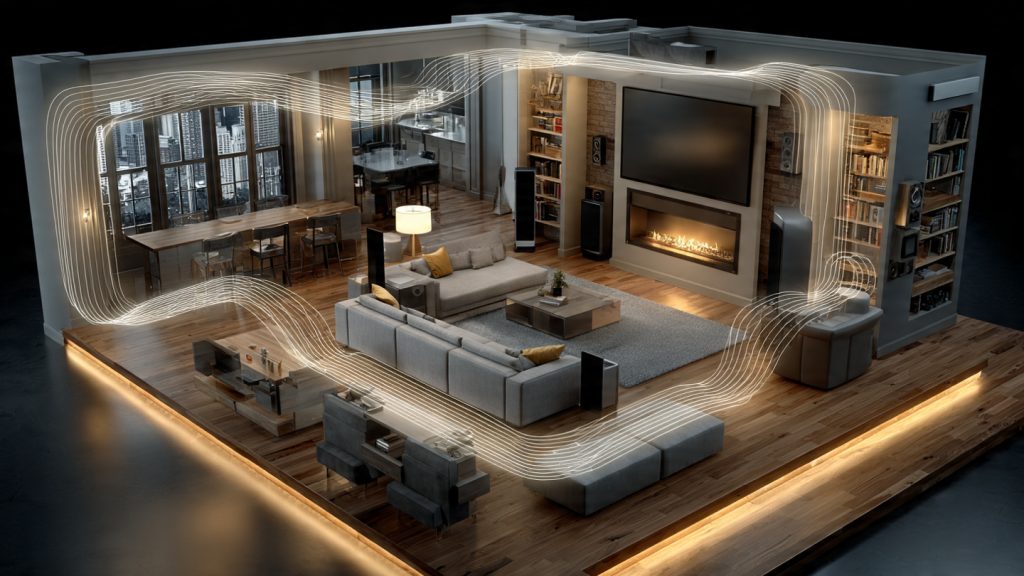
Room Design and Acoustics: Optimize Your Space
How room shape and materials change everything
Your room is an active part of the system: hard parallel walls create standing waves, bare floors and glass make reflections, and soft furnishings absorb high frequencies.
Walk into a friend’s basement theatre and you’ll often notice the bass booms and smeared dialog caused by untreated corners and reflective side walls—those are solvable problems.
Practical placement and sightline rules
Position your main seating so the center speaker is aimed at ear level and the primary row is about 1–2 screen heights from the screen (cinema viewers often use ~1.5× screen height). Use an equilateral triangle for L/R and main seat; stagger additional rows to avoid sitting directly in a null. Mount or angle speakers to avoid direct reflections off the screen.
Reflection control and surface treatments
Use the mirror trick to find first‑reflection points on side walls and ceiling (have a partner move a mirror along the wall while you sit at the listening position). Treat those points with absorbers or thick curtains. Replace large bare rugs or add a heavy rug over hardwood; curtains (Madison Blackout or similar) both control light and tame highs.
Bass management and subwoofer strategies
Stationary bass modes are the common culprit. Use the sub‑crawl method: place the sub at your listening position, play a bass sweep, walk the perimeter to find the spot with strongest bass, then place the sub there. Consider two subs (SVS SB series or Hsu Research) to even response. Use corner bass traps (GIK, Auralex or DIY with Rockwool/OC703) for low‑end control.
Ceiling and height channels
For Dolby Atmos/height channels, use in‑ceiling speakers or acoustic clouds above the listening row to reduce ceiling reflections. In smaller rooms, upward‑firing modules work but need a treated ceiling to limit smear.
Quick measurement and DIY fixes
Use Room EQ Wizard (REW) with a calibrated USB mic (miniDSP UMIK‑1) for sweeps to find peaks and nulls. Smartphone apps like AudioTools are useful for quick SPL checks. Treat peaks with absorption, nulls with repositioning or additional subs.
Budget vs. pro decisions
Budget fixes: rugs, curtains, bookcase diffusion, DIY panels with OC703. Call a pro when you need built‑in treatments, major construction, multi‑sub optimization, or Dirac/room‑correction tuning for a dedicated room.
Next, you’ll feed this tuned room with sources and streaming options—choosing hardware and codecs that make your optimized space sing.
Source Components and Streaming: Feeding Your System
You’ll learn how to choose and configure sources so your display and speakers can reach their potential. Below are practical, real‑world choices and setup tips.
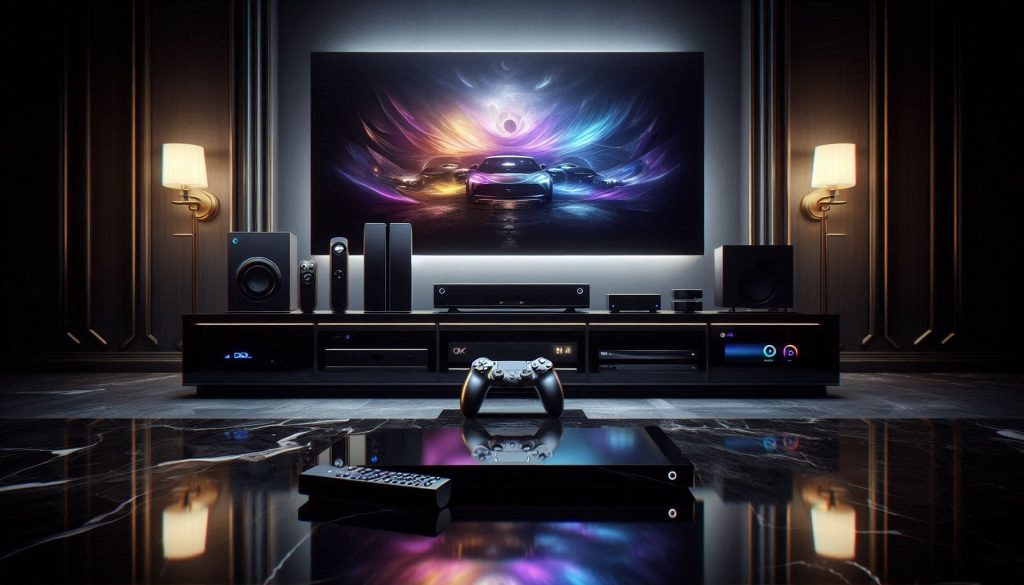
Streaming devices vs. 4K Blu‑ray and consoles
Streaming devices are convenient; physical players give maximum video/audio fidelity and less compression.
Audio and codec realities
Understand what’s being sent to your AVR or processor.
Media servers, NAS and ripping workflows
Centralized libraries make playback and metadata clean.
Practical setup tips
Small steps with big payoff.
Gaming vs movie primary source
If gaming is primary, pick a console with HDMI 2.1 (PS5/Xbox Series X) and enable Game Mode, VRR, and 4K/120Hz. If movies are primary, choose a dedicated 4K Blu‑ray player or a streamer with proven HDR tone mapping.
Next up: cement those choices with the right cables, control systems, and installation strategies to keep signals and devices working seamlessly.
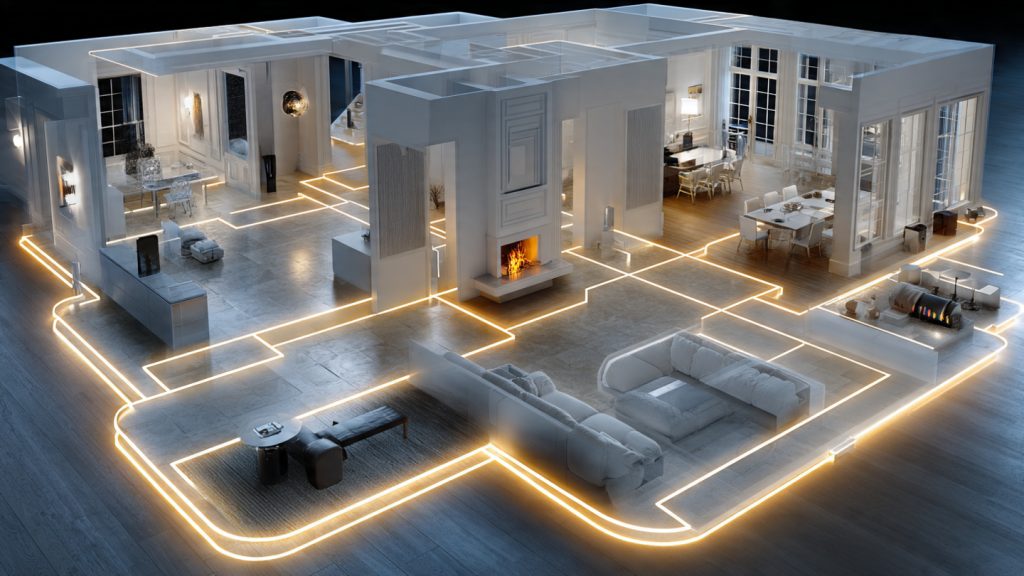
Connectivity, Cables and Control: Future-Proof Your Setup
HDMI versions and what really matters
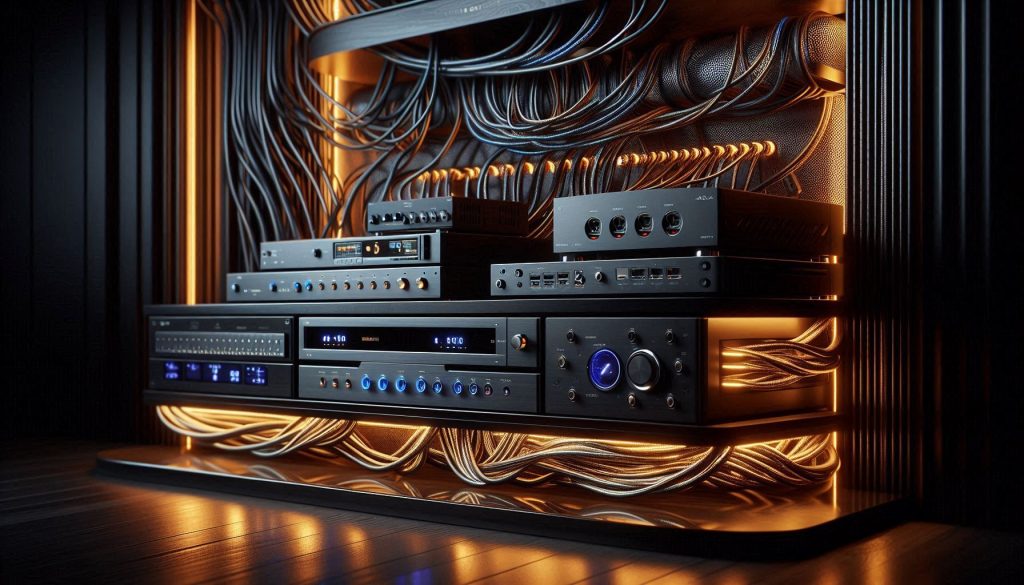
HDMI 2.1 (48 Gbps) is the baseline for modern home theaters: think 4K/120Hz, 8K/60Hz, VRR, ALLM and eARC. HDMI 2.0 (18 Gbps) still works for 4K/60 and HDR10, but it will bottleneck gaming features and high-bitrate audio passthrough. In practice, use certified 48 Gbps (FRL) HDMI cables for sources that need 4K/120 or uncompressed multichannel audio — cheap or mislabeled cables are the most common culprit when a feature doesn’t work.
Example products: Marantz/Denon AVRs and Marantz/Trinnov processors typically honor full HDMI 2.1 features; AVPro Edge and Atlona make reliable HDMI matrixes that preserve advanced signals.
Network: wired where possible, mesh where needed
You’ll get the most reliable streaming and home-server performance with wired Ethernet. Aim for 2.5G/10G ports on your NAS and AVR if you stream large 4K files or use multiroom audio.
If wiring every room isn’t practical, use a high-performance mesh (Wi‑Fi 6E today; Wi‑Fi 7 devices are arriving) positioned to avoid interference. Prioritize wired backhaul and enable QoS and IGMP snooping on your router for consistent streaming.
Best Home Theater Tips
Matrixes, processors and multi‑zone routing
An HDMI matrix or an AV processor is the difference between ad‑hoc and professional systems. Use a matrix when you need different sources in multiple rooms; choose an AV processor if you want scalable processing, Dirac/Trinnov room correction, and modular HDMI boards so you can swap I/O without rewiring.
Cables, power and surge protection
Buy certified HDMI 2.1 (48 Gbps) cables for critical links; for runs over ~10–15 m, prefer active copper or optical HDMI cables. For network runs, install Cat6A (shielded if near power) to support 10GbE. Protect equipment with whole‑home surge protection plus a rack-mounted conditioner (Furman/Panamax) and UPS (APC Smart‑UPS) for source gear and network hardware.
Control systems and automation
Pick a control strategy early: smart-home platforms (Home Assistant, Control4, Crestron, Savant) integrate AV, lighting and HVAC. For handheld control, pros use URC or RTI remotes; voice and scene automation (coming on for scene‑based movie presets) are handled by Josh.ai or Home Assistant. Always assign static IPs and create scene macros (e.g., “Movie Night”: dim lights, lower projector screen, route Blu‑ray to theater).
Upgrade paths to avoid rewiring
Run conduit, install extra Cat6A and spare HDMI/fiber stubs to centralize changes. Choose processors with modular I/O or matrix front-ends so future format shifts don’t force a full rebuild — a small prep cost today saves major headaches later.
Next you’ll learn how to install, calibrate and maintain these components for peak performance.
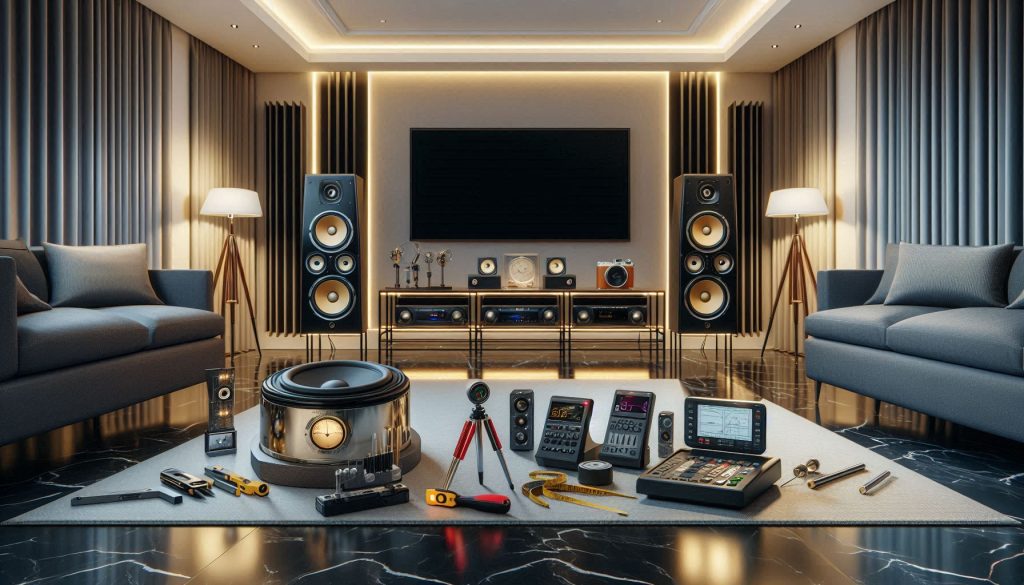
Installation, Calibration and Maintenance: Get Peak Performance
Getting the most from your gear is half technique, half patience. Below are practical, repeatable steps and tools so your speakers, subwoofer and display perform as the designers intended.
Speaker placement checklist
Follow this step-by-step for consistent imaging and coverage.
Tools: laser distance measure, tape, and an SPL meter or calibrated mic (miniDSP UMIK‑1).
Subwoofer integration & phase/time alignment
Bass is more positional than people expect—small moves matter.
Tools: REW (Room EQ Wizard), DBX/Behringer measurement mic or UMIK‑1; SVS SB‑2000/3000 are good practical subs.
Display calibration basics
A basic professional workflow you can do or hand off:
Tools: X‑Rite i1Display Pro, CalMAN or DisplayCAL, Murideo SIX‑G for pattern generation; consider ISF/CalMAN pro for complex displays.
Automated correction: accept vs fine‑tune
Accept automated results when they flatten response and improve imaging quickly (Dirac Live, Trinnov, Audyssey XT32). Manually fine‑tune when tonality feels synthetic or bass nulls persist—use REW to identify room modes and add EQ or bass traps.
Maintenance & troubleshooting
Routine tasks: firmware updates, rack ventilation (leave 2–3″ airflow, use fans/vented racks), clean contacts, seasonal check of speaker mounts.
Common fixes:
Next, you’ll tie these practices together in the concluding section to finalize your 2026 home theater roadmap.
Bringing It All Together
Prioritize display and audio first: pick the screen or projector that matches your room and viewing habits, then invest in speakers and a subwoofer that deliver the dynamics you want. Treat your room with basic acoustic measures, choose source components and streaming services that support the formats you value, and lock in connectivity and control options that scale with future upgrades. Balance features against budget—more expensive gear isn’t always the best fit if it exceeds your room or content needs.
Before buying or installing, run this checklist: room dimensions and seating plan, display type and brightness needs, speaker layout and sub placement, acoustic treatment basics, chosen sources and HDR/codec support, required inputs/switching, and calibration plan or pro installer. With these priorities and a short checklist, you’ll move forward confidently and create a home theater that consistently delivers cinematic experiences at home. Enjoy your films and games.
Loved the installation and calibration chapter. A practical question: when someone says ‘set speaker distances precisely’, how precise are we talking? Millimeters? inches? Or is plus/minus a foot OK?
Also: any guidance on when to call a pro for room treatments? I don’t want to spend months experimenting if I’m doing it wrong.
I did a DIY first and then hired a consultant to fine-tune bass traps — best money spent. The difference was subtle but meaningful.
Great questions. For speaker distances, aiming for within a few inches (say ±2–3 inches) is usually enough for most listeners — you don’t need millimeter precision. Trust your ears after the auto-delay finish. For room treatments, DIY can work for first-order reflections; call a pro if you have persistent modal issues (boomy bass in certain seats) or for complex multi-room builds.
Thanks — a few inches sounds doable. Might try DIY first and bring in help only if needed.
Short and sweet: the audio section sold me. Went from TV speakers to a modest 5.1 setup and holy smokes, movies are a different animal now. Worth every cent.
Couple of practical tips I learned the hard way:
– Label your cables. Seriously.
– Use speaker stands if you can, placement matters more than isolators.
– Invest in a decent calibration mic (not the cheapest) for better auto-EQ.
So glad it’s working out, Ethan. Labelling makes future changes so much less painful. And yes, mid-range measurement mics are a great investment if you calibrate often.
Agreed on stands — they helped my imaging big time. Where did you get your calibration mic?
I bought the XLR-mic from a reputable audio brand and used an adapter for USB — cost mid-range but dramatic improvement over the cheap clip-on mics.
If you want, I can add a short appendix next update listing mic options at different price points.
For anyone on a budget, the calibrated USB mics from certain manufacturers are surprisingly good and super plug-and-play.
Nice write-up, but I’m skeptical about pushing giant projectors into every living room. My neighbor did that and now hosts impromptu backyard screenings — lost my Saturday gaming sessions to ‘family movie night’ lol.
Jokes aside, any tips for glare control on ambient windows? Curtains make the wife grumpy, so I need alternatives 😂
If the wife is okay with aesthetics, layered window treatments (sheer + blackout) look nicer and let you dial light precisely. Works great in multipurpose living rooms.
Awesome ideas — ALR sounds promising. Thanks, folks!
Ha — projectors can take over a household if you’re not careful! For glare control without full blackout curtains, consider motorized shades with light-dimming fabrics, high-contrast screens (ambient-light-rejecting), or strategic placement of the screen away from direct window lines. Films on the windows that reduce glare, or even side-mounted blinds, can be a good compromise.
ALR screens are a lifesaver in bright rooms. They reject light from above, so you keep picture brightness without darkening the whole room.
I built a cozy basement theater following some of the article’s layout tips and couldn’t be happier. A couple of notes from experience:
– Don’t forget HVAC noise — silencers or a duct muffler helped us a lot.
– Seating risers = cinematic feel, but check sightlines before building.
– Keep an easy-access panel for future cable upgrades. You will need it.
Also, shoutout to the streaming section — helped me decide between a NUC and a streamer box for my Plex server.
Curious — what did you use for sound isolation for the HVAC? I need something similar.
I’ll post some photos later this week — the riser was narrower than I wanted but still made a big difference.
Fantastic — HVAC is a commonly overlooked issue, thanks for mentioning it. And excellent tip about the access panel; saves so much trouble down the road.
Seating risers were a game-changer for my small room too. Totally agree on sightlines. Pics? 😄
Great overview — loved the room acoustics section.
I actually moved my speakers after reading a similar tip and the bass cleared up so much.
One question: for a medium-sized living room, would you prioritize an acoustical treatment over a sub upgrade? Budget’s tight.
Also, the calibration tips sounded doable even for a non-pro installer. Thanks for including that!
PS: small typo in the HDMI 2.1 paragraph (extra ‘the’), but minor 😊
Thanks, Laura — glad the acoustics tip helped. For a medium room on a budget, acoustic treatment (bass traps/panels) usually gives a bigger overall improvement than a single sub upgrade. Calibration after treating the room will help you get the most out of either option.
Agreed — cheap panels do wonders. If you can, try to borrow a mic and run auto-EQ after moving stuff around. It’s like magic (but, you know, math).
Totally — I swapped my couch position and added a couple of panels behind the TV. Way better imaging. And yup, the small typo caught my eye too 😅
Absolute fanboy moment: the part about immersive audio got me ordering a height-channel kit the same day. 🤓
Two quick notes:
– Check AVR firmware before buying weird formats.
– Don’t forget to calibrate heights separately in the menu, some systems treat them weirdly.
This article pushed me to actually finish the project instead of stalling — thanks!
Congrats! If you get any odd phantom center voices, double-check your speaker distances and do a thorough auto-setup with the mic in listening position.
Love that! Height channels really complete Atmos effects when placed properly. And yes — AVR firmware updates and the correct channel mapping are critical. Happy listening!
Really appreciated the breakdown of source components and streaming. The comparison between upscalers and native 4K sources cleared up some confusion for me.
Two quick points:
1) Would you still recommend a separate streamer if my TV has a capable smart platform?
2) Any suggestions for preserving HDR metadata through AVR passthrough? I lost Dolby Vision on one of my setups and it was maddening.
Good questions. 1) A dedicated streamer can give you better app updates, search, and bitrates than some TVs — yes, recommended if you care about longevity. 2) For HDR metadata, ensure your AVR supports the same HDR formats (Dolby Vision, HDR10+) and use high-quality 48Gbps HDMI cables; sometimes enabling ‘Passthrough’ vs ‘Process’ in the AVR settings is the fix. Firmware updates often solve compatibility issues too.
Also check the HDMI port versions on both the TV and AVR — weirdly enough, using a different ARC/eARC port on the TV solved DV passthrough for me once.
Good article overall, but I felt the ‘Future-Proof Your Setup’ section skimmed over wireless latency issues. Lots of folks assume wireless = convenience, but lag kills gaming and sync.
Also, tiny gripe: some of the suggested cables are pricier than they need to be. You don’t need to mortgage your house for HDMI.
Totally — for gaming I always run at least a wired connection for consoles/PCs and use Wi-Fi only for casual streaming devices. Latency matters much more than convenience in that case.
Thanks, Sophie — fair points. We’ll expand the wireless latency subsection to cover gaming-grade wireless and wired fallbacks. And we’ll clarify budget vs audiophile cable recommendations so readers can choose sensible options.